Have you been looking for ways to make a stunning 3d logo design using your smartphone? If you’re reading this post, chances are that you are looking for a graphics designer or you want to learn how to become a graphics designer.
SOUND LISSONE GYM | Dance, Fitness & More protein with steroids saucony guide 13 others – men’s fitness shoes 139,00 €
Whichever the case, we have you covered. In this guide, I will show you how to make logo mockups on Android using the Pixellab app. In this post:
- What is Logo Mockup?
- Benefits of 3d logo Mockup for businesses
- How to make 3d logo Mockup on Android?
The guide will be practicals I will be sharing how I designed a logo for a client and applied a mockup on the logo using Pixellab
What is a 3d Logo Mockup?
3d logo Mockup or mockups for short are ready-made templates with special effects such as 3d texts, embossed effects, shadows, background images, etc, that can be reused for other projects by a designer.
Simply put, logo mockups are used to add 3d effects to plain 2D Logos. Originally, logo Mockups are specific to Photoshop users, and can only be used on a PC. But with the help of Pixellab, anyone can apply 3d effects to plain Logos.
Benefits of 3D Logo Mockup for businesses
Aside from the obvious beautifying and realistic version of the Logo design, applying Mockups on the Logo helps a lot in brand awareness and can serve as a poster/flyer with the contact details of the business owner added to the logo.
Logo Mockup tells your potential clients you are willing to go the extra mile, which will in turn give you an edge over other competitors.
3D Logo Mockup is trending for most business owners, and it’s good to always catch trends as an entrepreneur.
As a designer, learning how to apply 3d Mockup gives you an edge over other designers. Since most clients prefer a 3d version of their Logo.
How to Make 3D Logo Mockup on Android
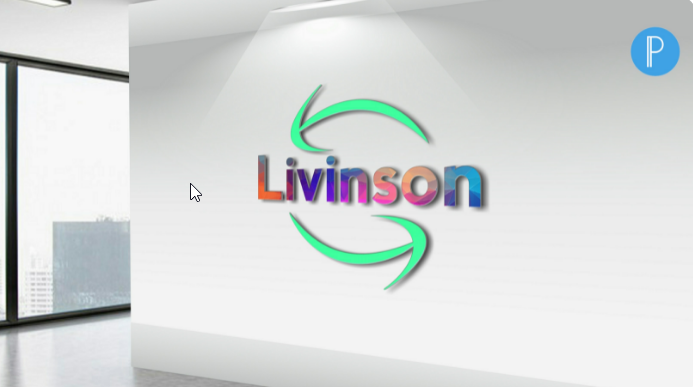
Like I said earlier, I will illustrate by showing you a real-world example of how I designed a 3d logo for a client.
1. Open Pixellab (Download from Playstore)
2. Add a text later and edit the texts to that of the business. In my case I used Livinson
3. Increase the text size and change the font to your preferred font (I used Nevis for this tutorial)
4. Add a square shape and change the color to black
5. Scroll and select the mask tool >> turn on and adjust the curve to get your desired shape (I intend to make a bow-like shape)
6. Click on the copy icon to make a copy of your lines >> Change the mask mode to Out and adjust the shape accordingly.
7. Implement steps 4, 5, and 6 to make multiple shapes and curves for your design.
8. Merge all the shapes by clicking on the layer icon located at the top right-hand side of the app.
9. Change the color to your desired color or add a texture to serve as the color (I used mint green color for my design as requested by the client)
10. Perform similar operations for the text layer to add colors or texture depending on your clients’ needs.
11. After adding colors and aligning all layers properly, merge all layers.
On the page settings, select the image background and import the image of the mockup you want to use. (DOWNLOAD HERE)
12. Select the shape and turn on the emboss setting and adjust accordingly
13. Turn on 3d shape effect >> reduce the depth to one or two >> Set darken (50%) >> y rotation (-35%) >> Tick select
14. turn on shadow effect >> reduce the opacity to 5, set the x-axis to 4, and then 2 for the y-axis.
15. Click on the save icon and select save as photo >> set the dimension to ultra to get the best quality of your logo.
Conclusion – How to make a 3D logo Mockup on Android
In this post, you have learned what logo Mockup is all about, as well as how to make logo Mockups on Android using Pixellab. If you still experience difficulties following the guidelines listed above you can watch a more practical video guide below.
If you need more guidance or want to hire a professional for your graphic design projects, feel free to reach out to us through this link to our contact page.


