

Would you like to create and verify a virtual USD bank account using Geegpay? Geegpay is one of the best virtual account providers that allows freelancers and remote workers to receive payments from foreign clients.
If you’re looking to create an active dollar account, this guide is for you.
In this tutorial, we’ll show you how to register and verify your Geegpay account and start receiving payments online.
Content:
- What is Geegpay?
- How to Open a Foreign Bank Account With Geegpay
- Creating a Virtual Dollar Card
- Conclusion
What is Geegpay?
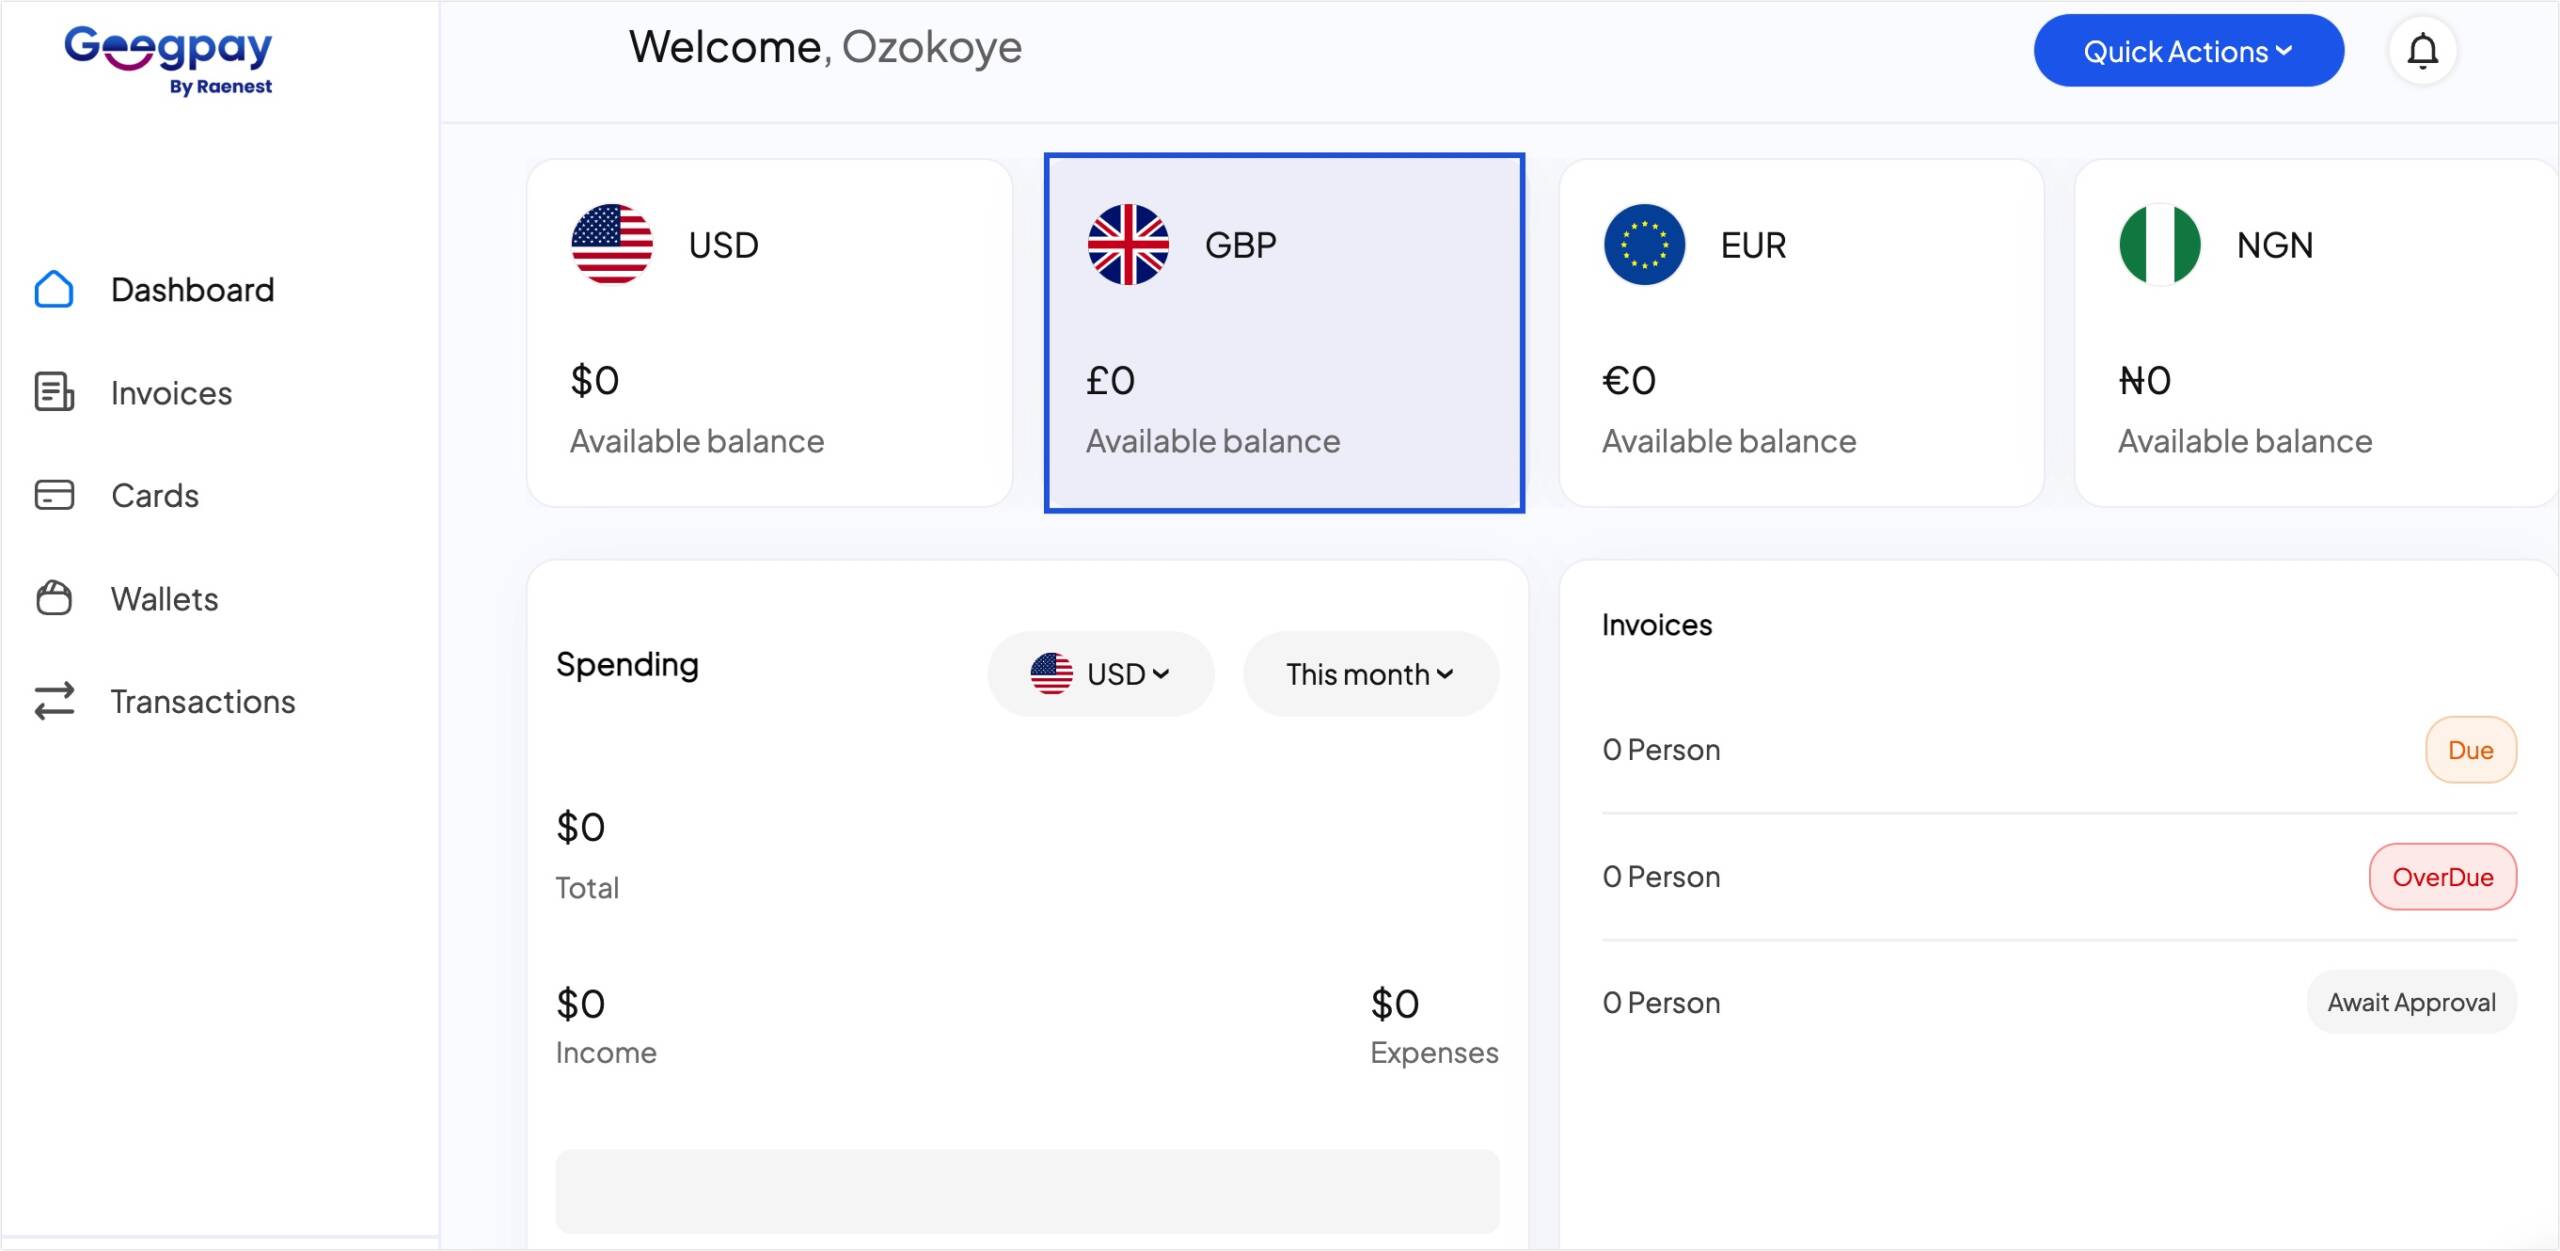
Geegpay is a virtual dollar account provider that offers users a means to receive cross-border payments from foreign employers. When you register and verify your account, you can request foreign USD, GBP, and EUR account balances,
With these virtual foreign bank accounts, you can easily receive payments from your clients and convert your funds to Naira.
Similar to Grey.co, Geegpay also provides virtual dollar card services. You can use your Geegpay account to request a virtual dollar card for online payments.
How to Open a Foreign Bank Account With GeegPay
Before you can access the foreign account balances, you’d need to open and verify your account. Once done, you’ll be able to request and use the USD account to receive payments online.
Registering Your Geegpay Account
To register your account, head over to Geegpay.africa and click on Open an account.

Next, you’ll need to choose the type of account you want to create. Unless you’re running a company, we suggest choosing the I am a freelancer option. This gives you access to foreign bank accounts and virtual dollar card services.
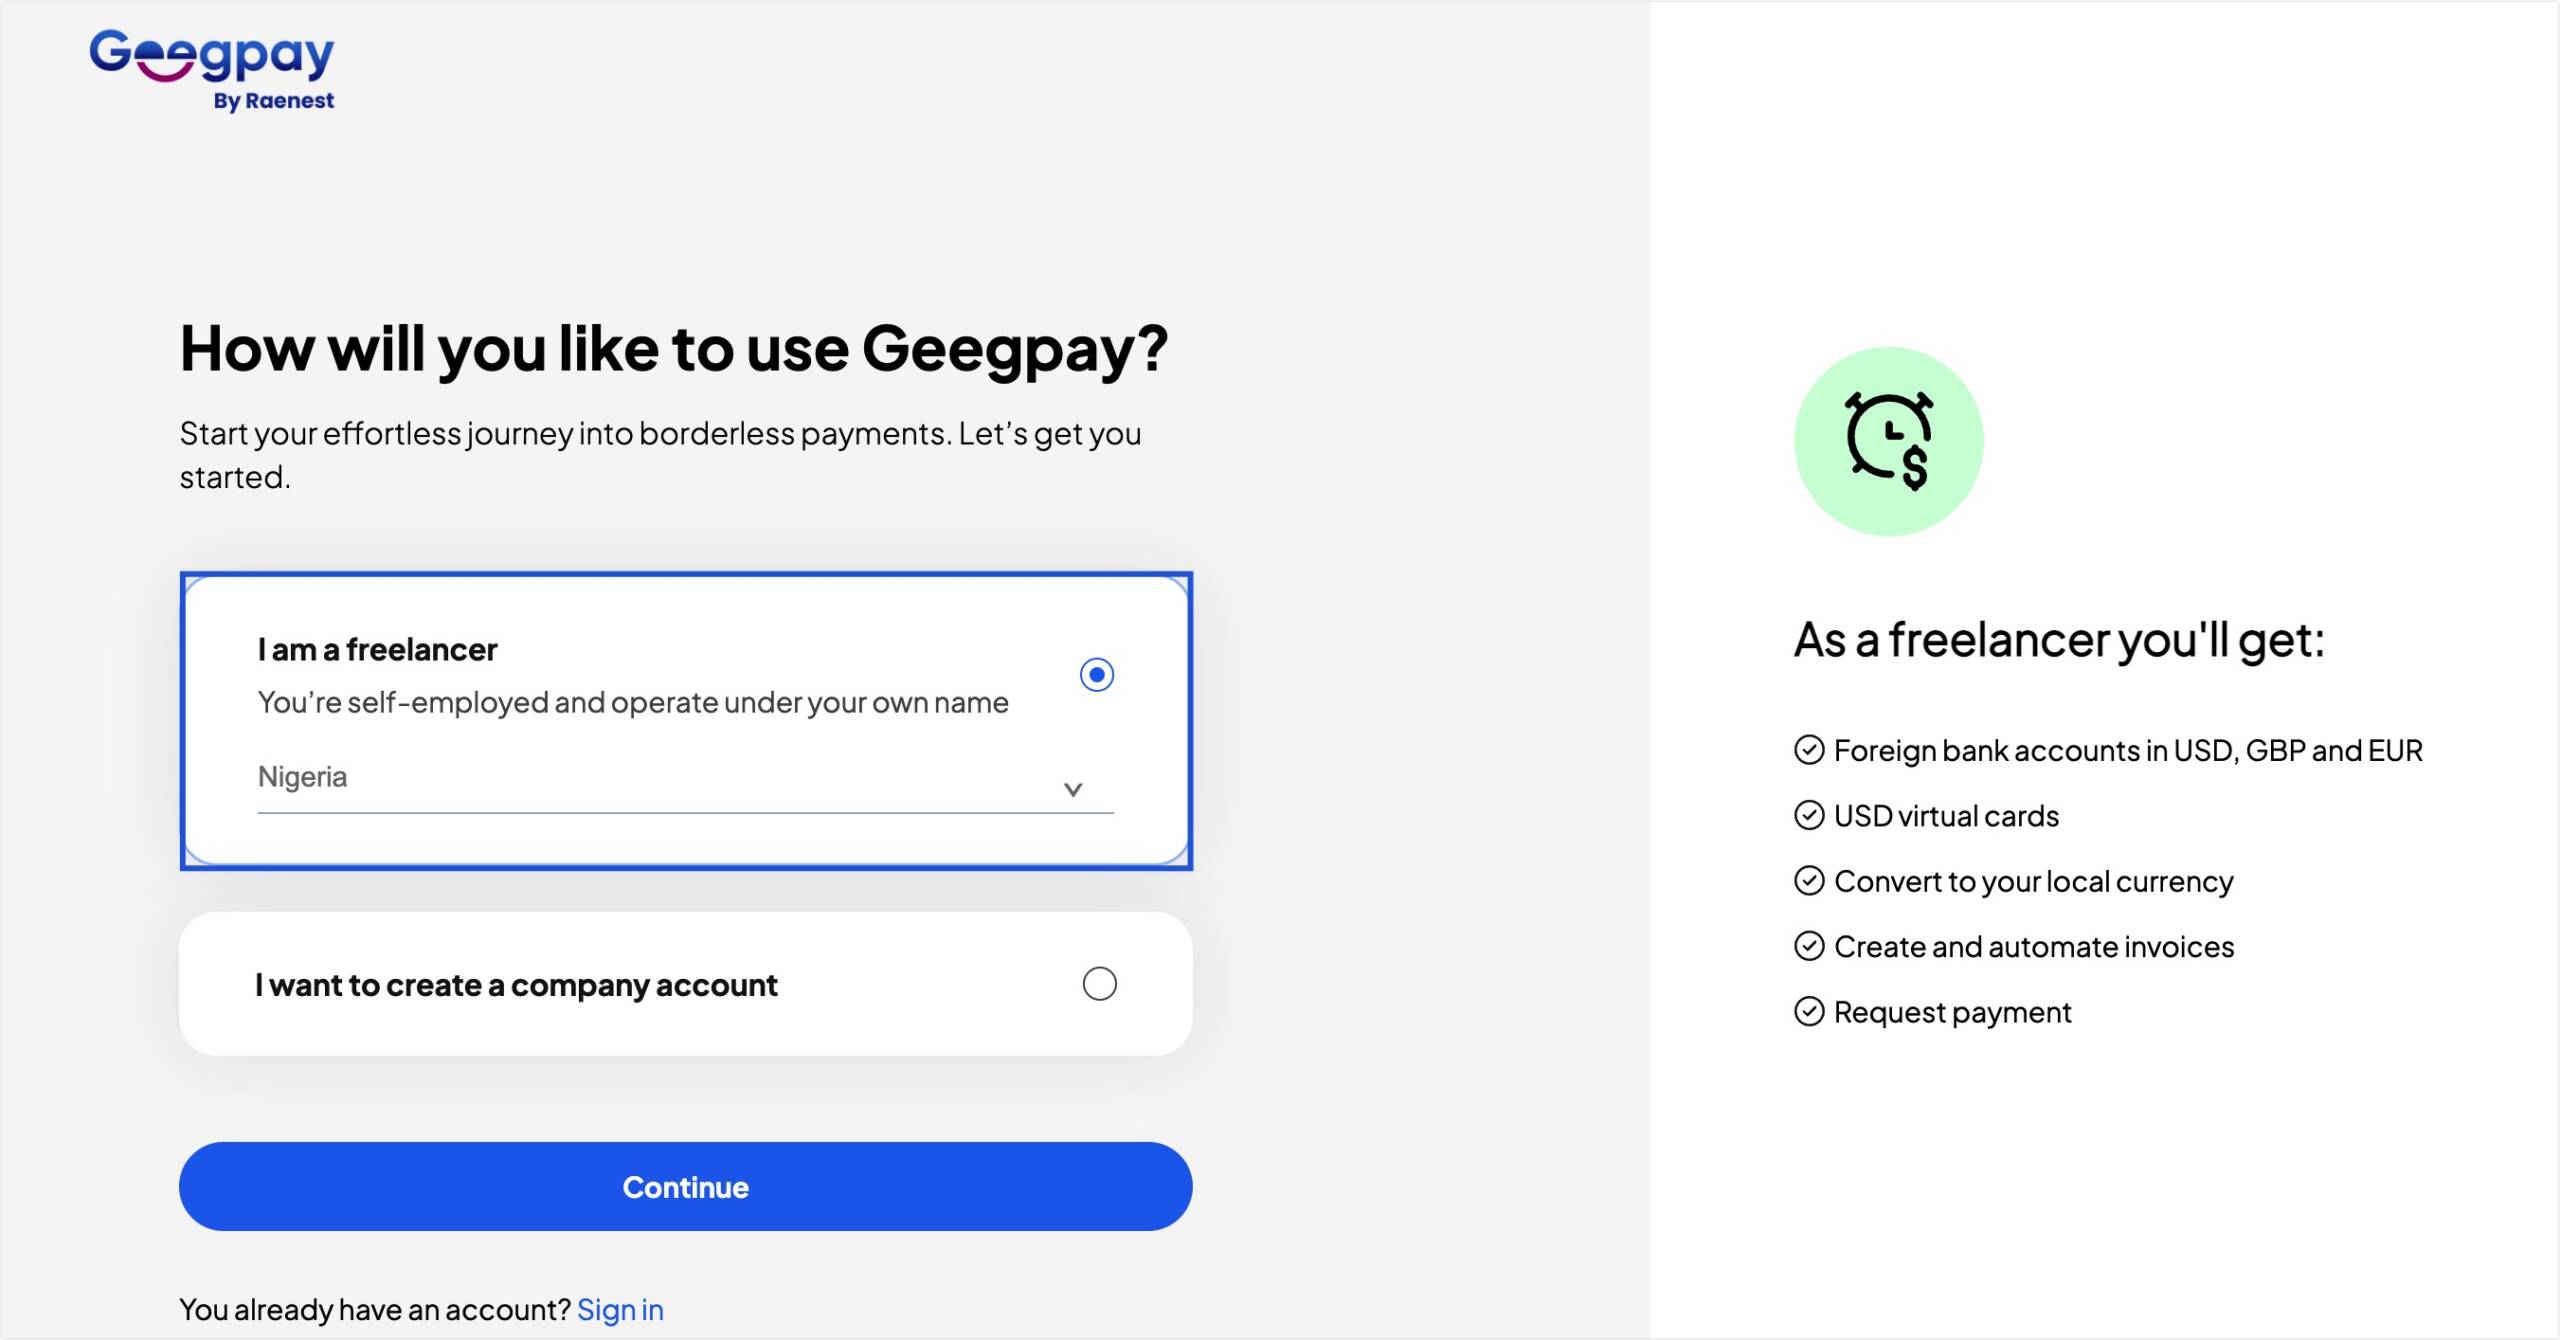
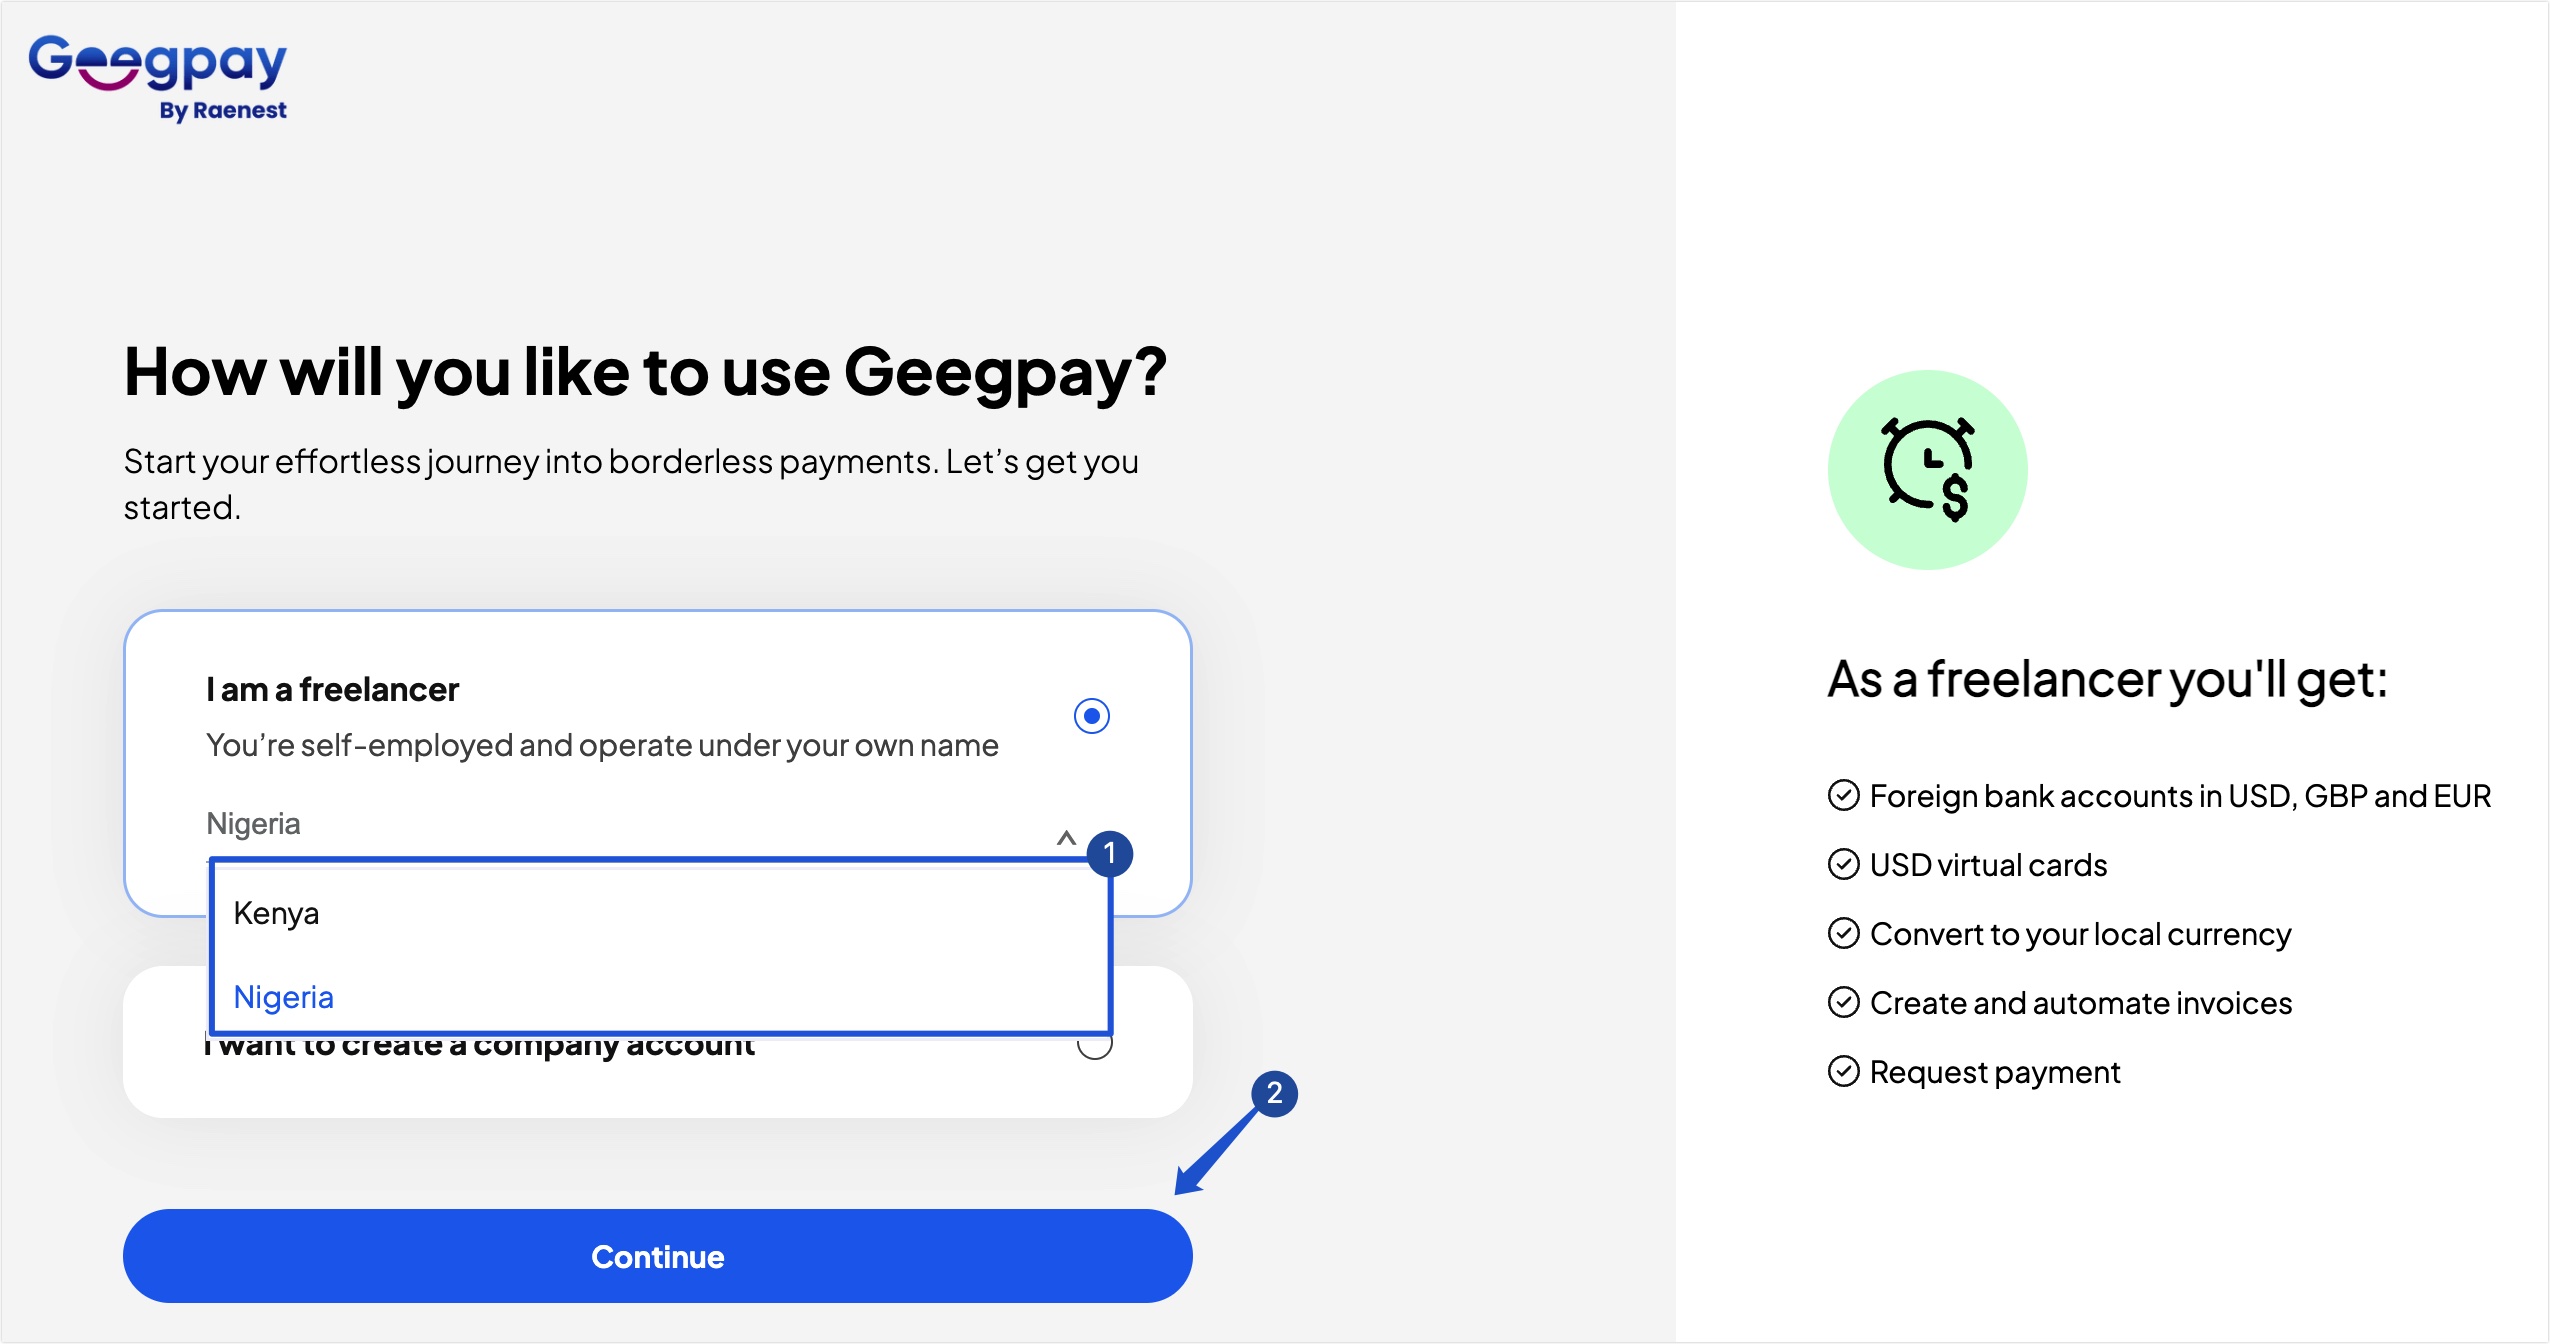
Click on the country dropdown and choose your country of residence. This is important as you’ll need an ID card issued by this country to complete your KYC verification.
Once done, click Continue to proceed.
Sidenote: The freelancer option allows users from Kenya and Nigeria to create an account. We recommend using the Business option if you’d like to create an account from other countries. Keep in mind you’ll need to verify your business on the platform.
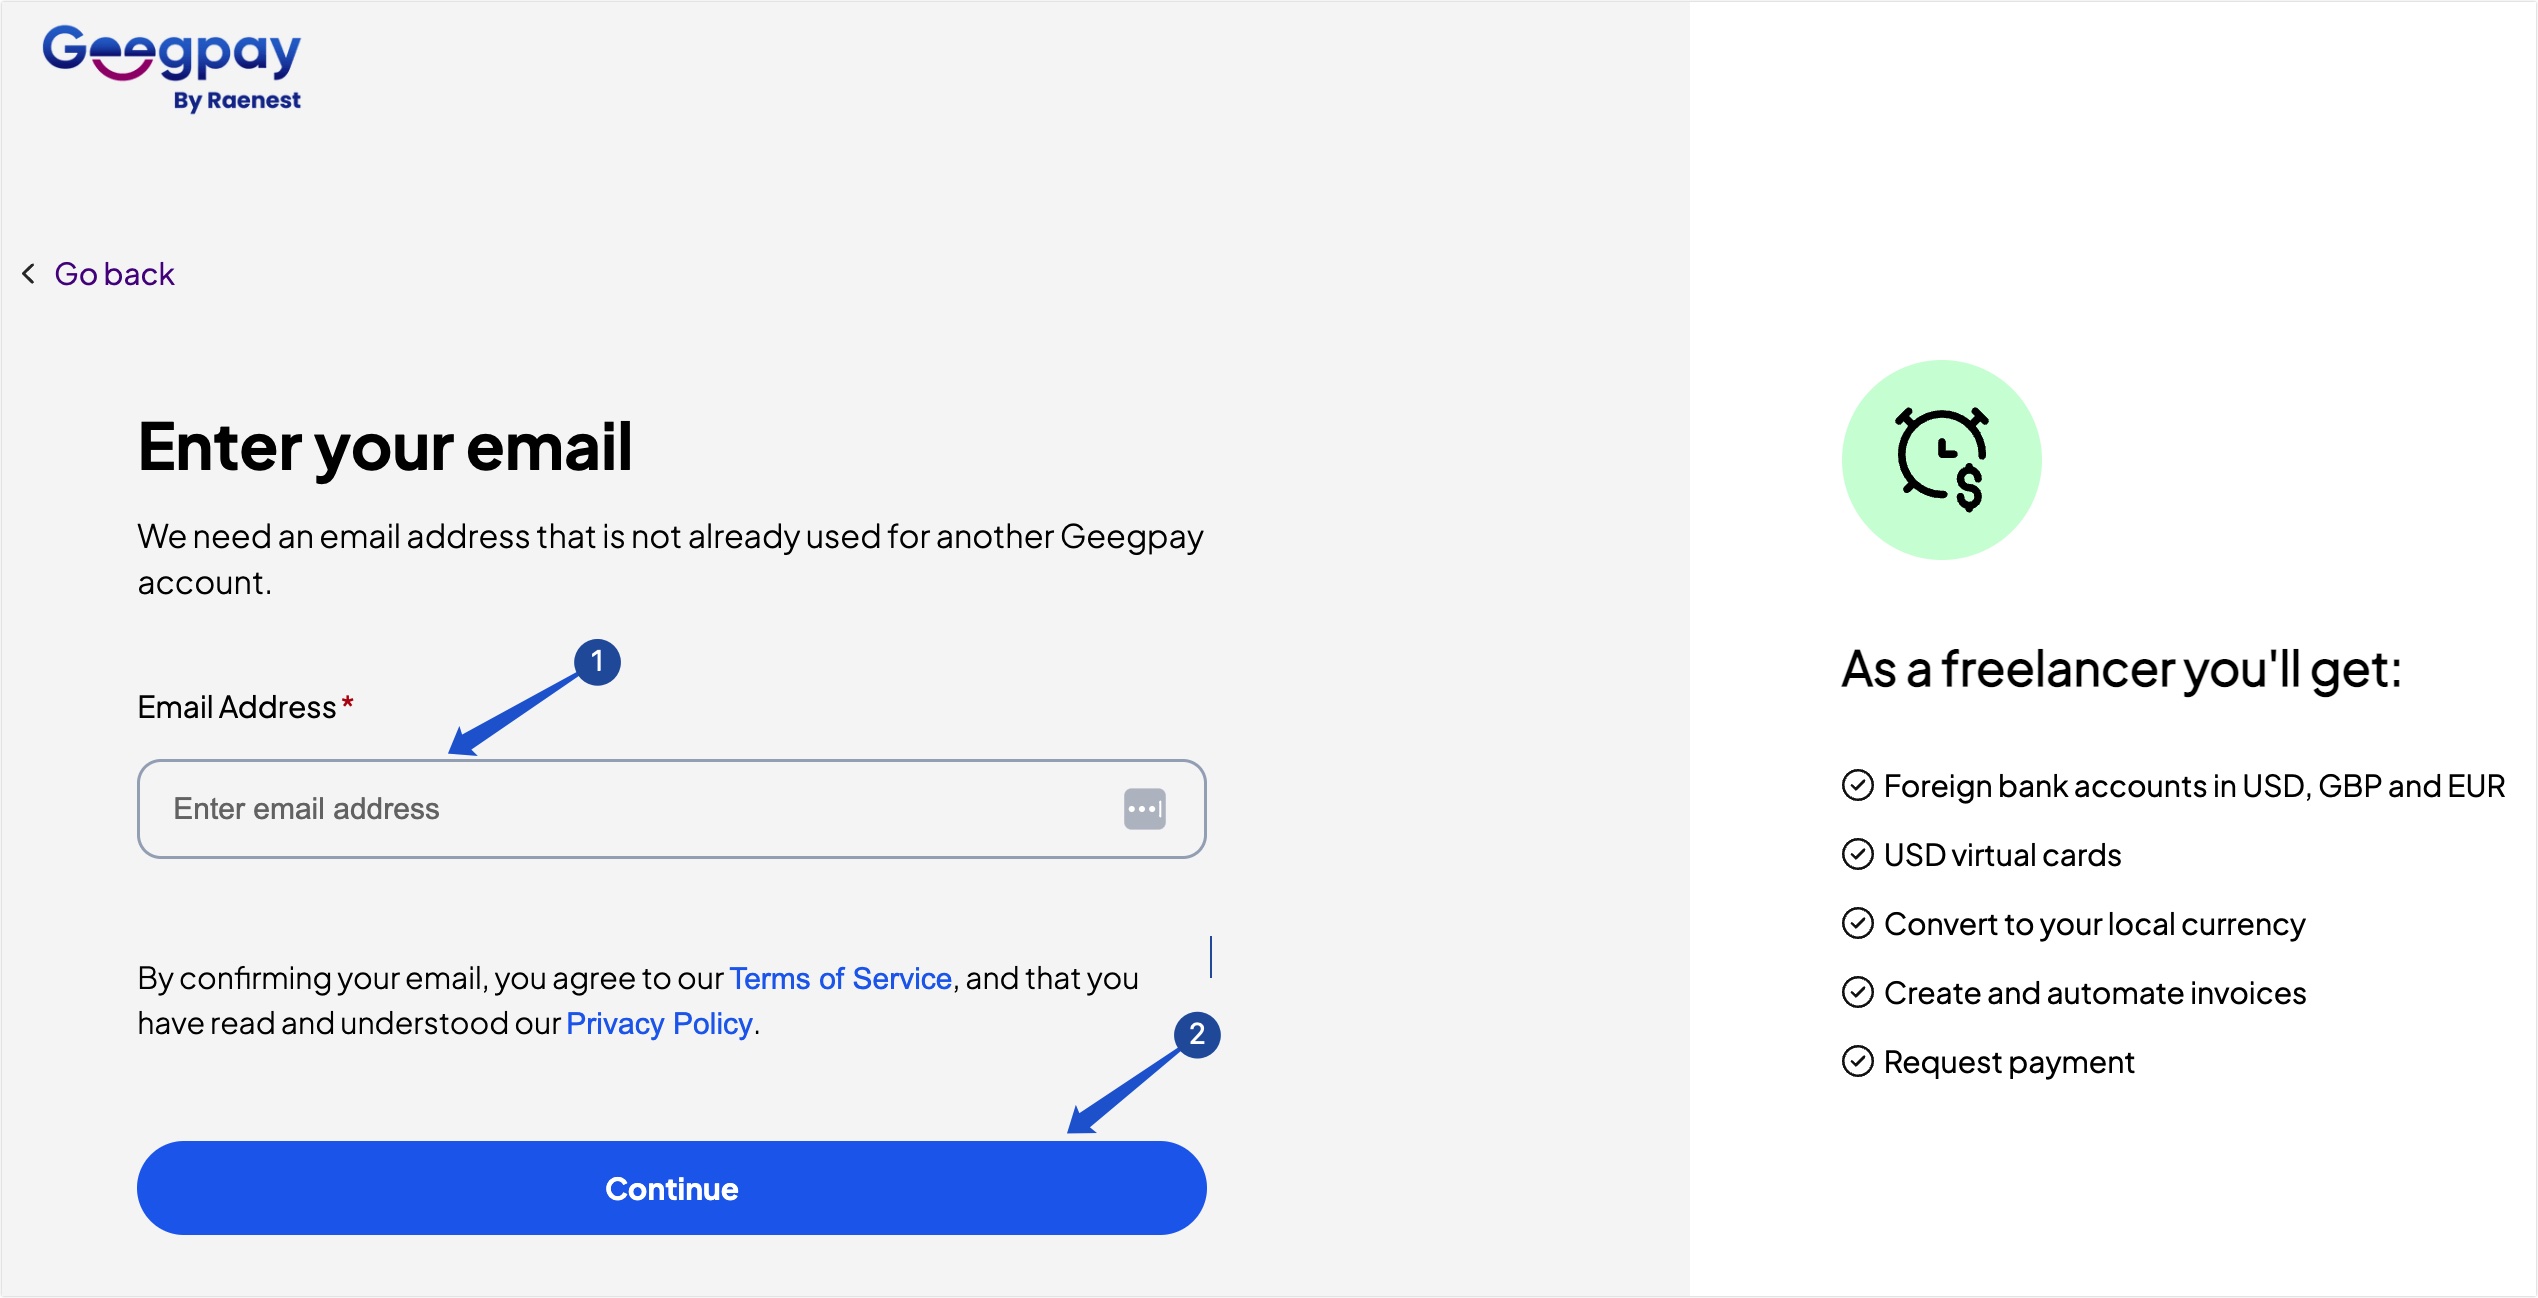
Next, enter your email address and click Continue to proceed.
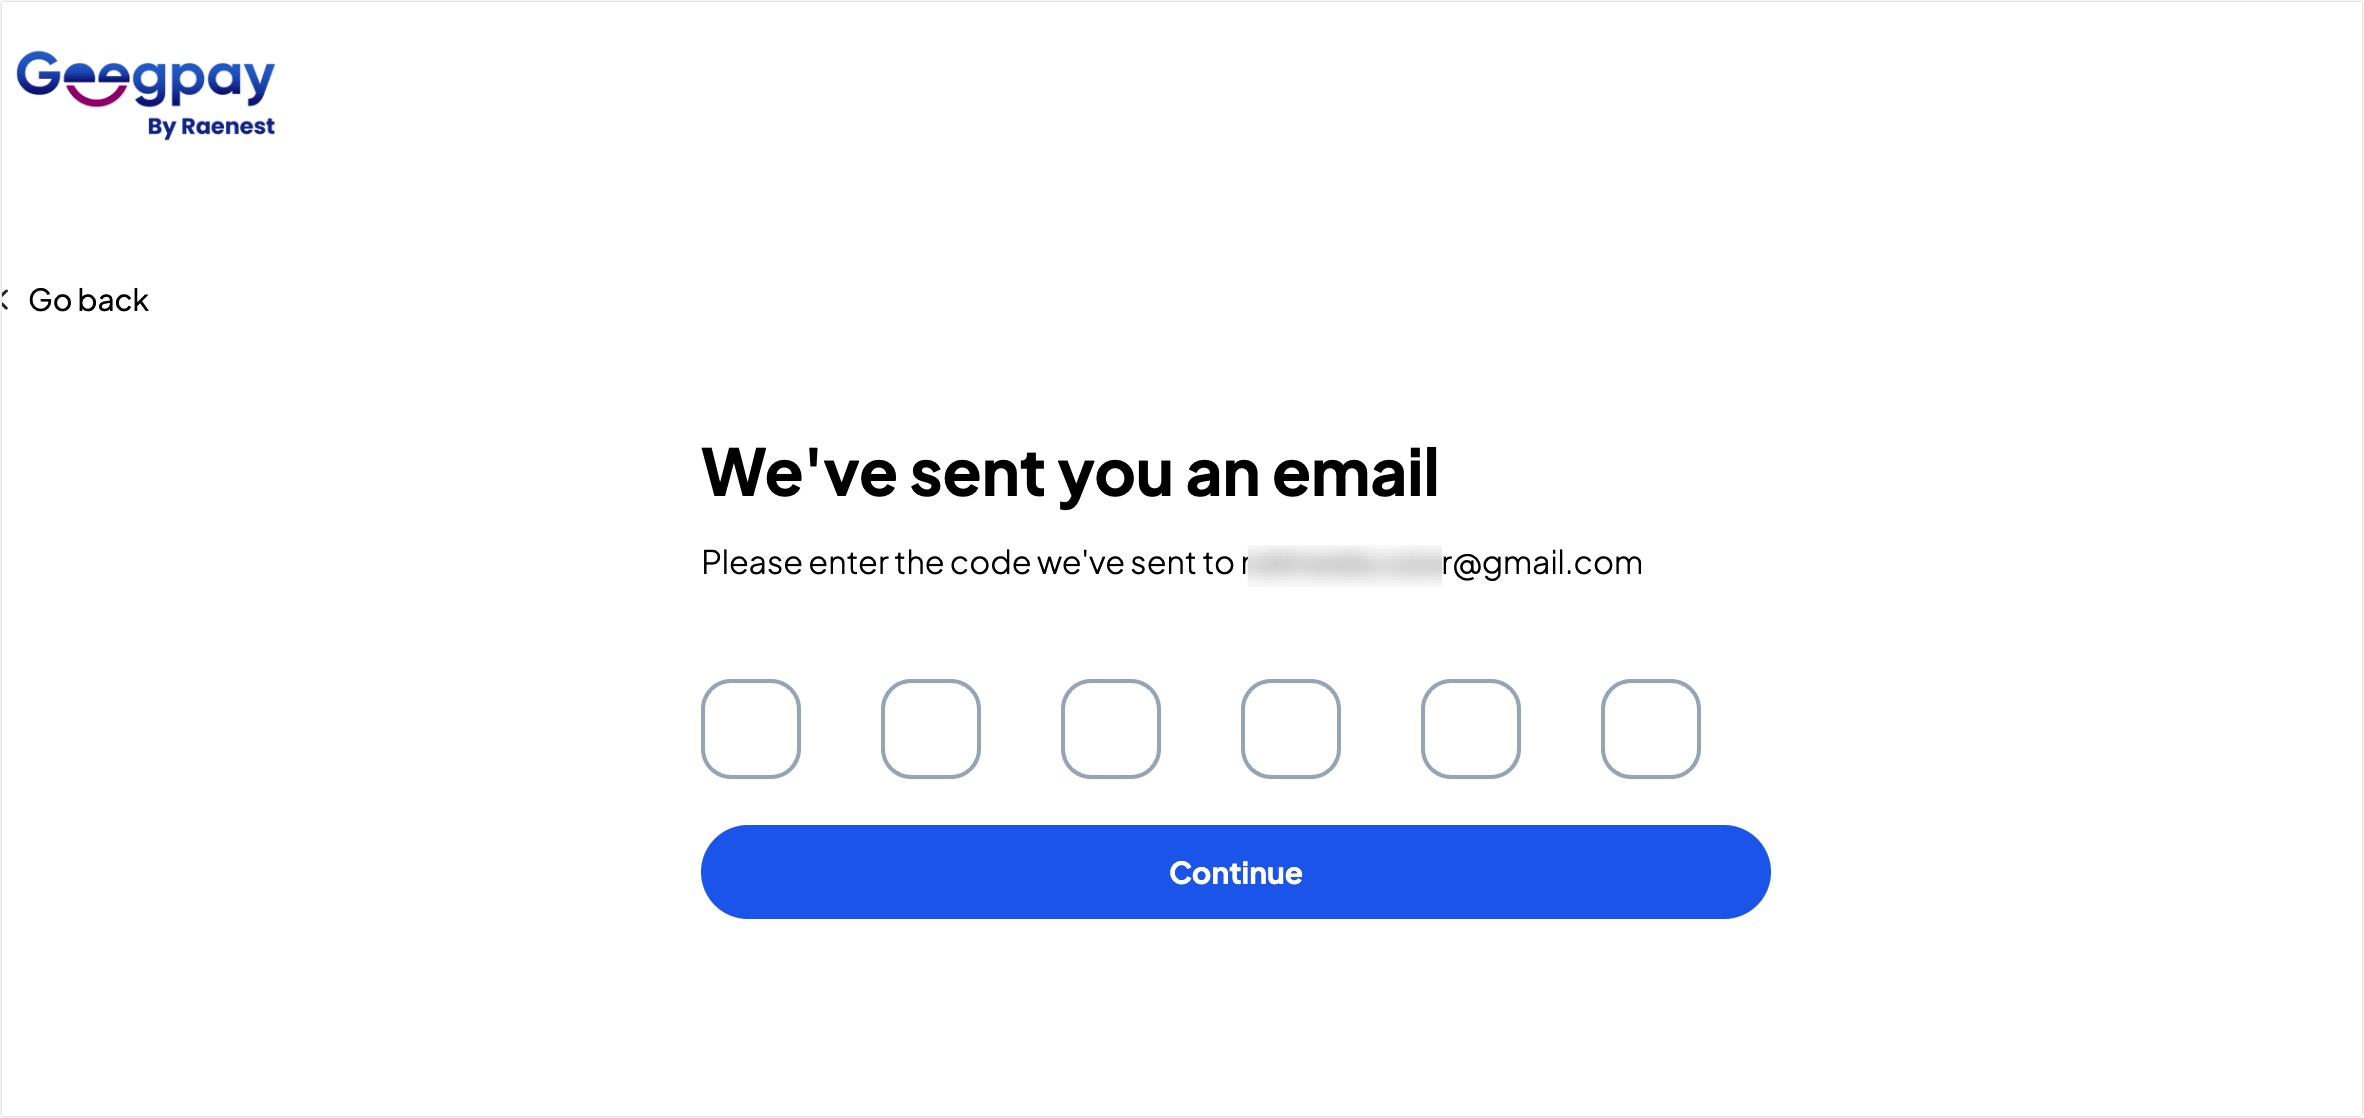
You should receive a verification code from Geegpay. You’ll need to enter the code to verify your email address.
Once done, you’ll be redirected to your Geegpay dashboard to continue your account verification.
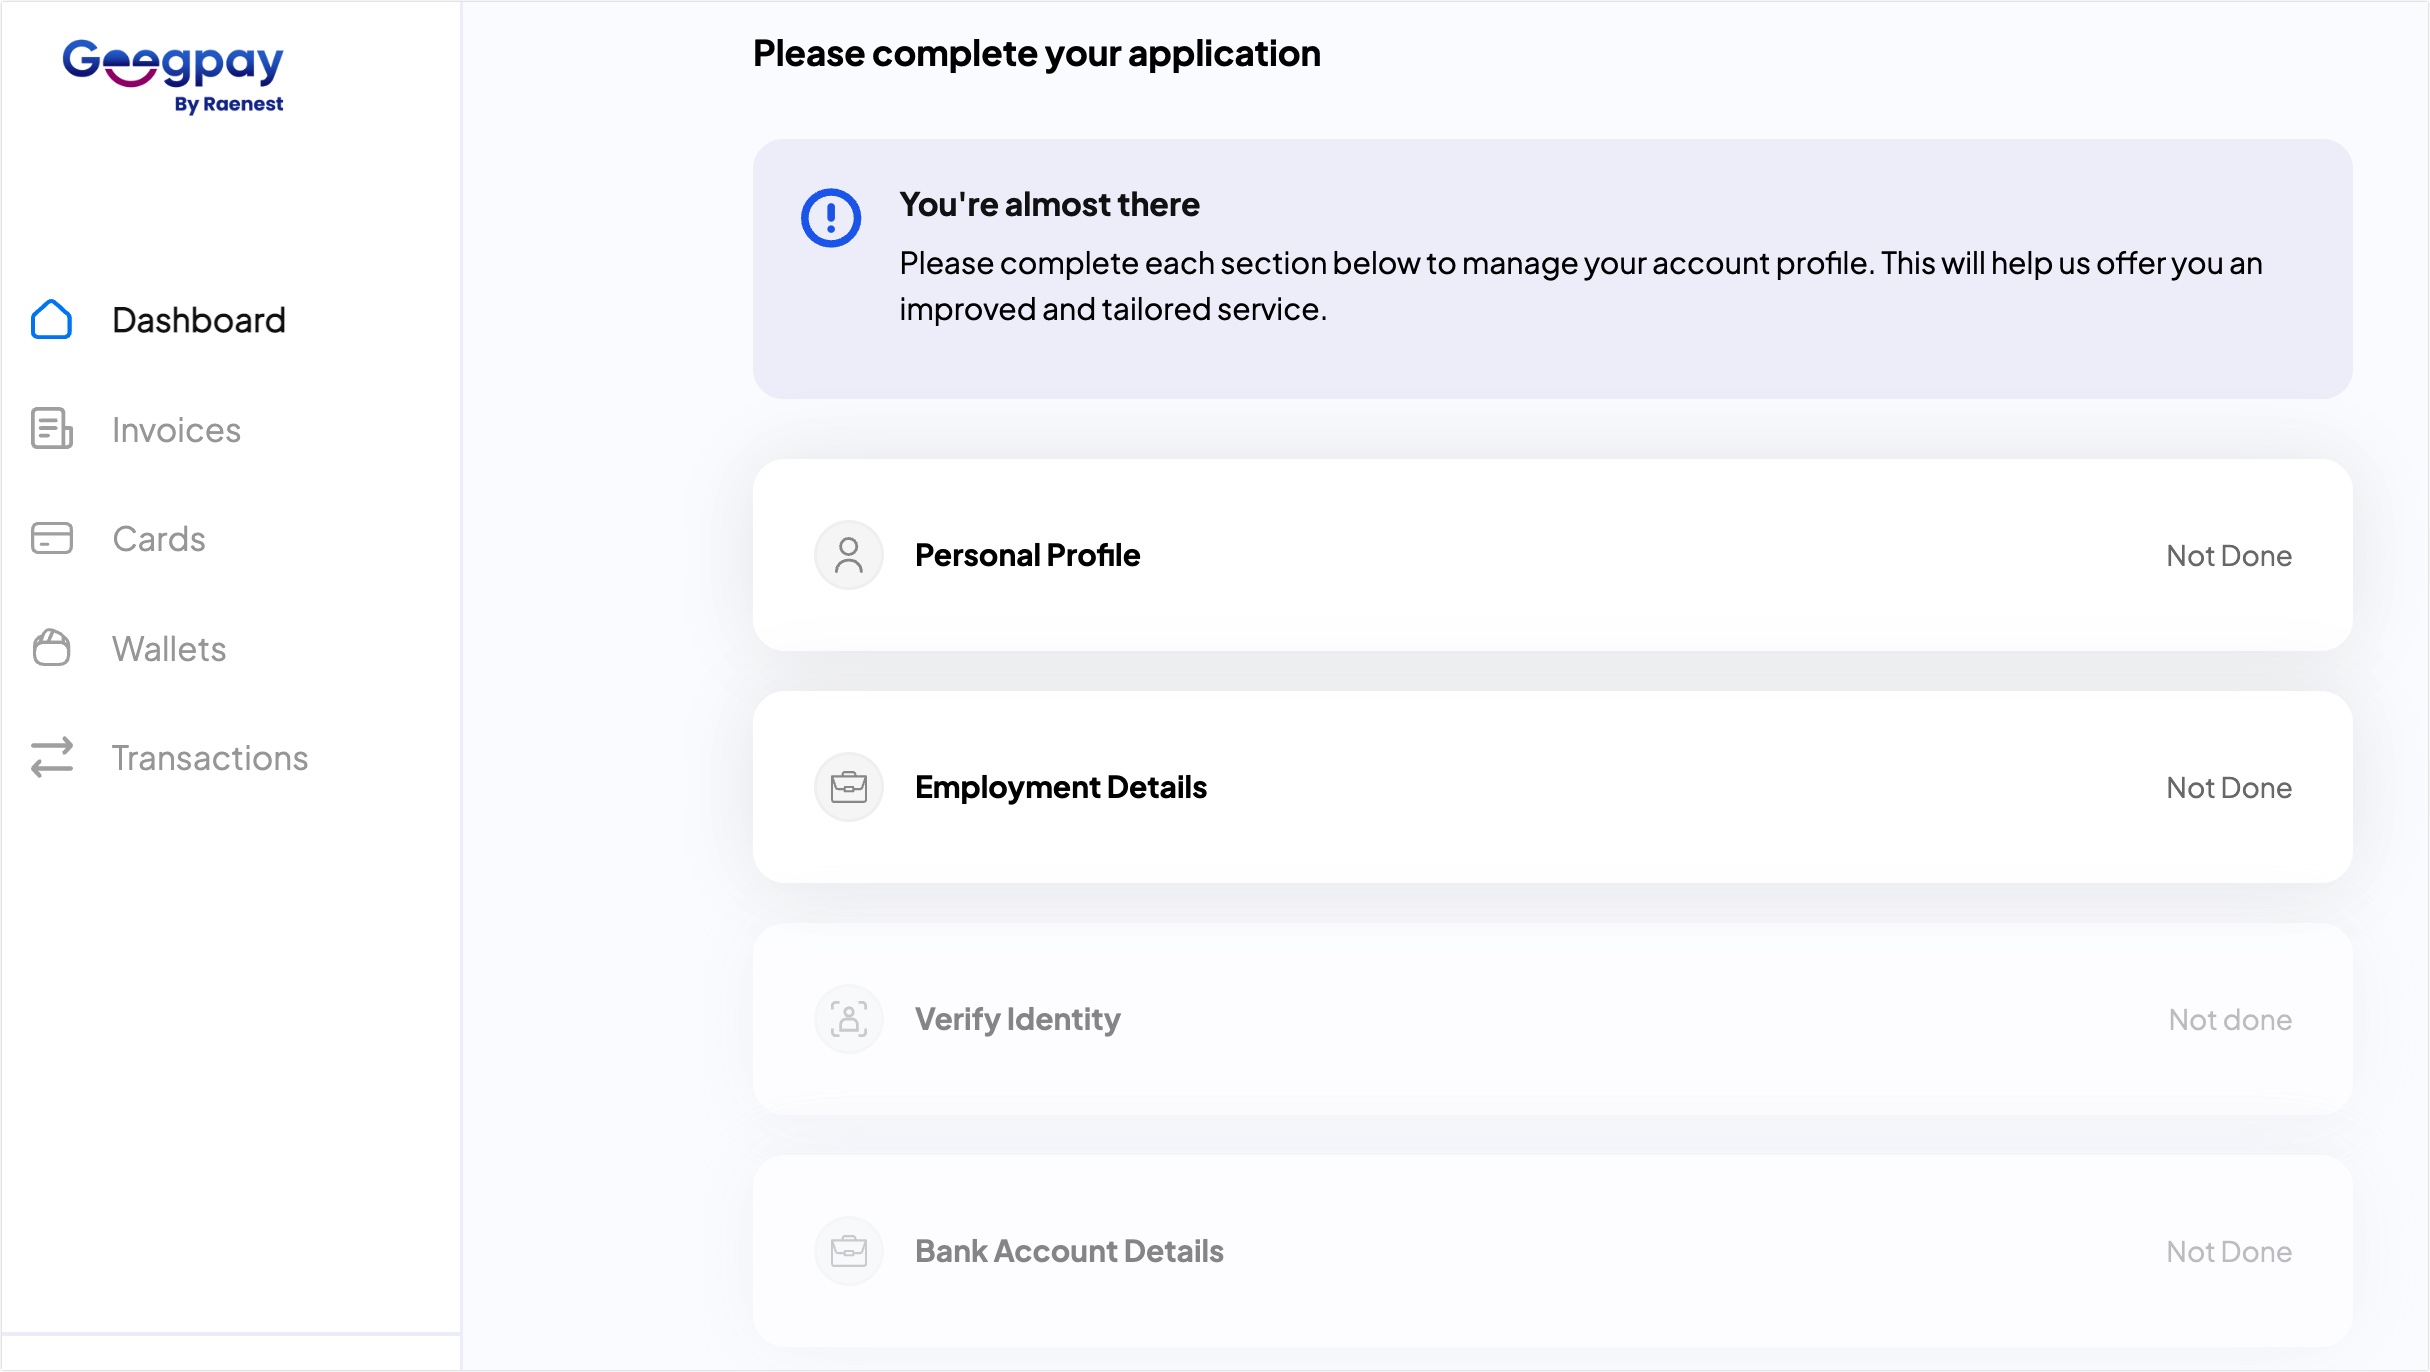
Verifying Your Geegpay Account
There are 4 stages of the verification process. First, you’ll need to enter your personal profile details. Then enter your employment details. After that, you’ll be required to verify your identity by uploading a valid ID. Once that is done, you’ll be able to generate your bank account details.
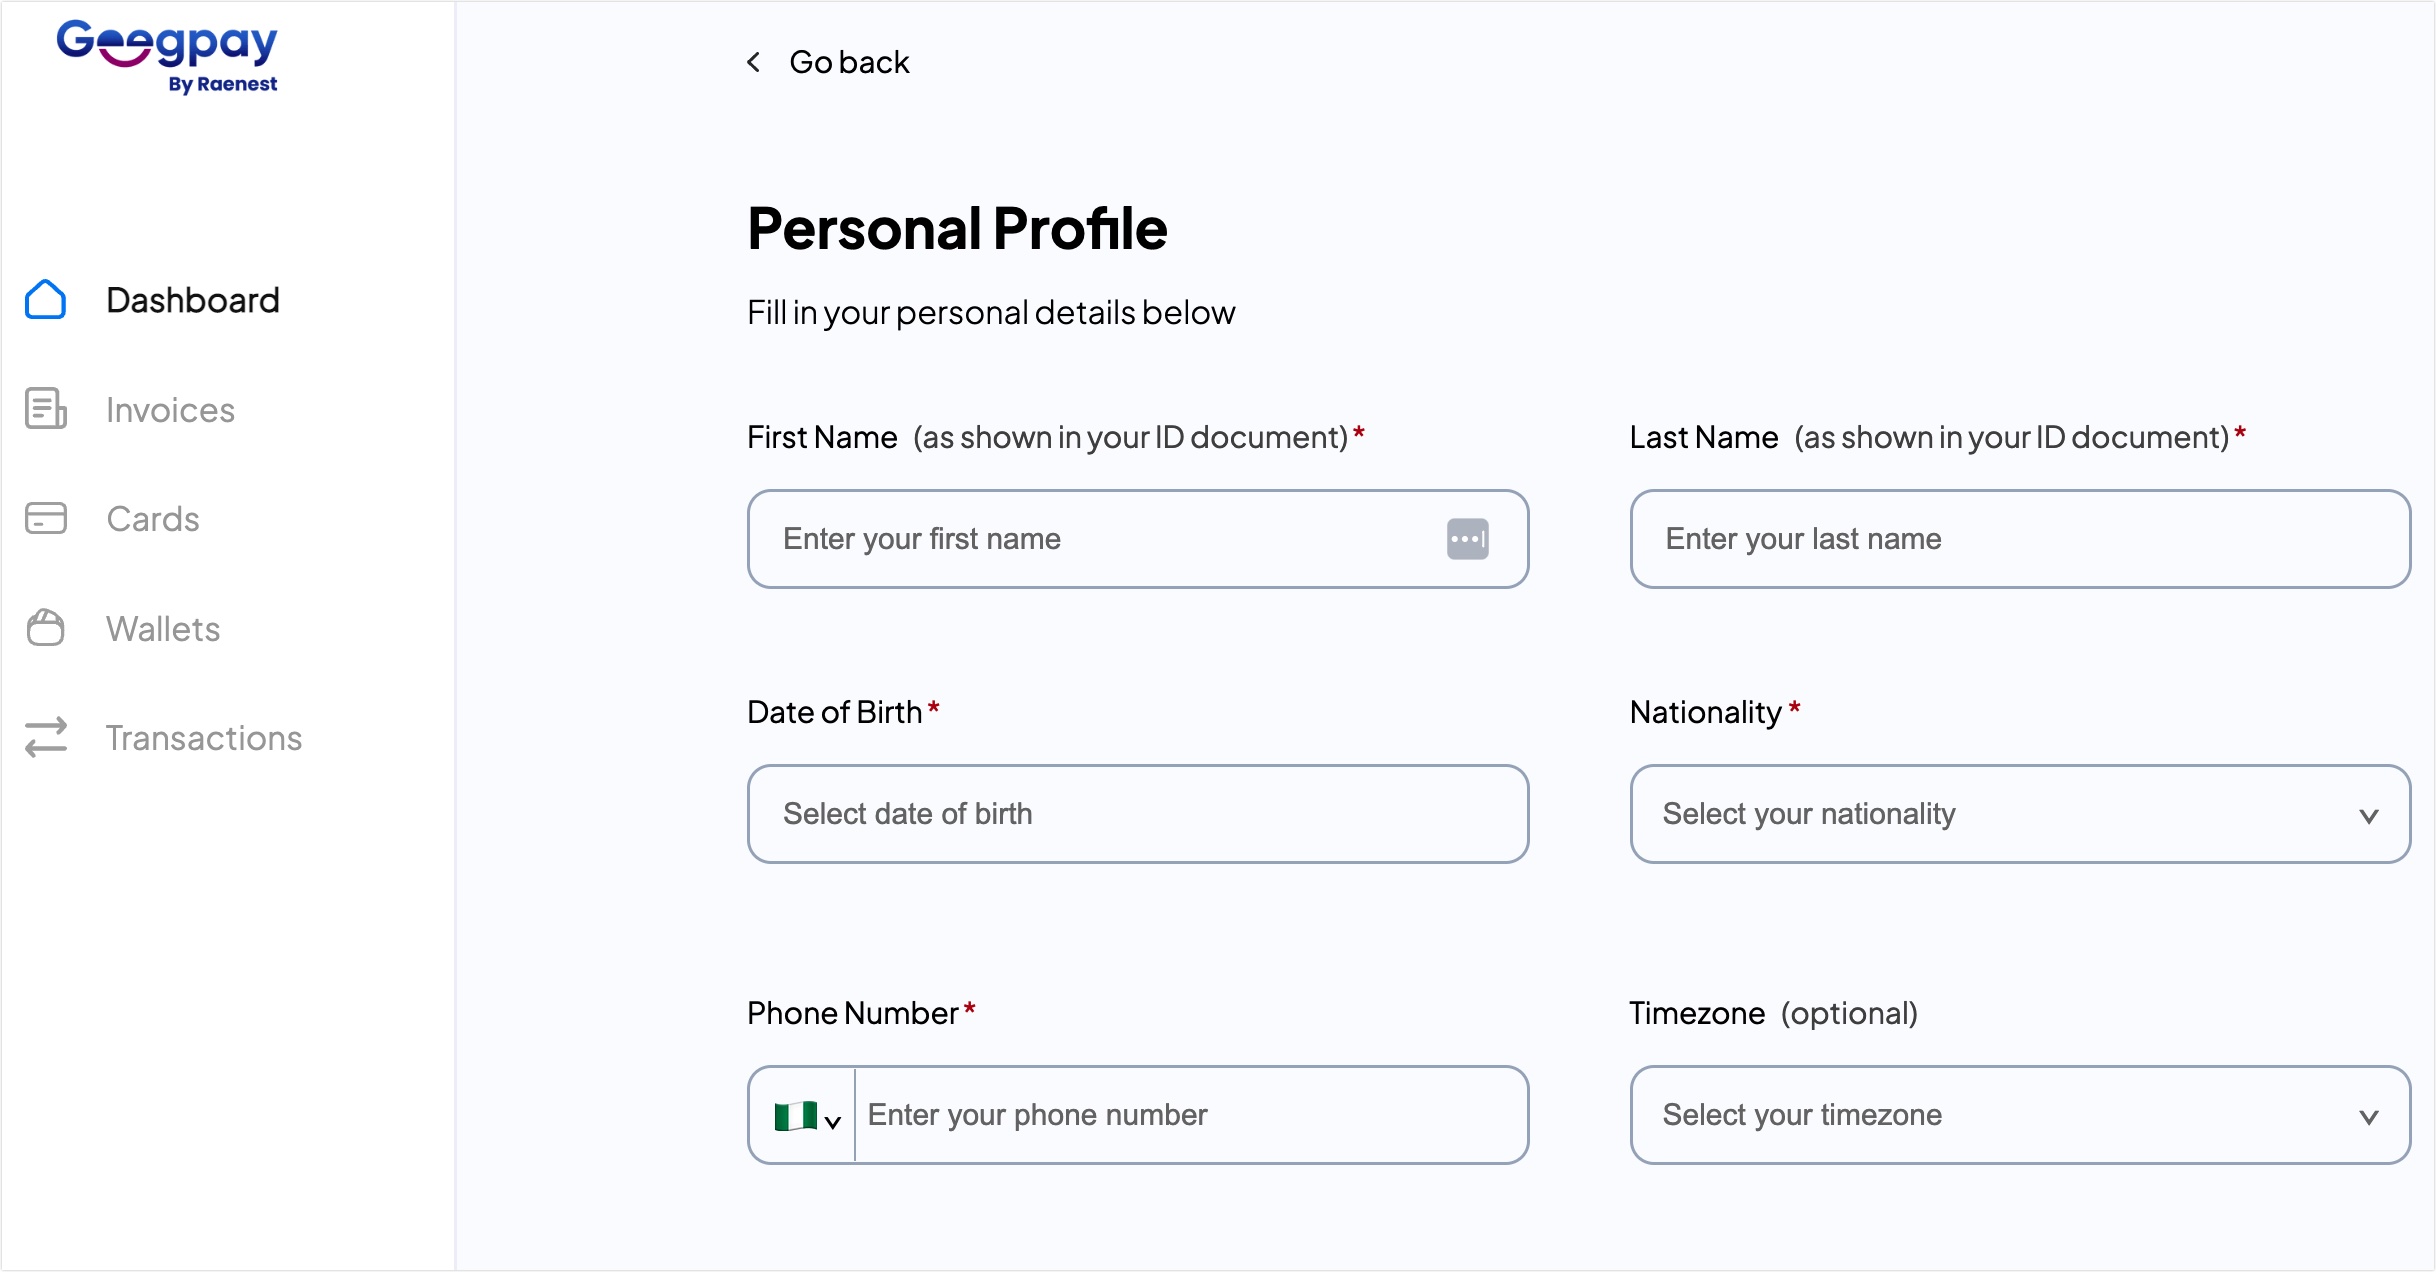
Under the Personal Profile section, you’ll need to enter your basic details such as your name and birth date.
Note: You’ll need to verify your phone number to proceed. We recommend using a phone number whose inbox you can access.
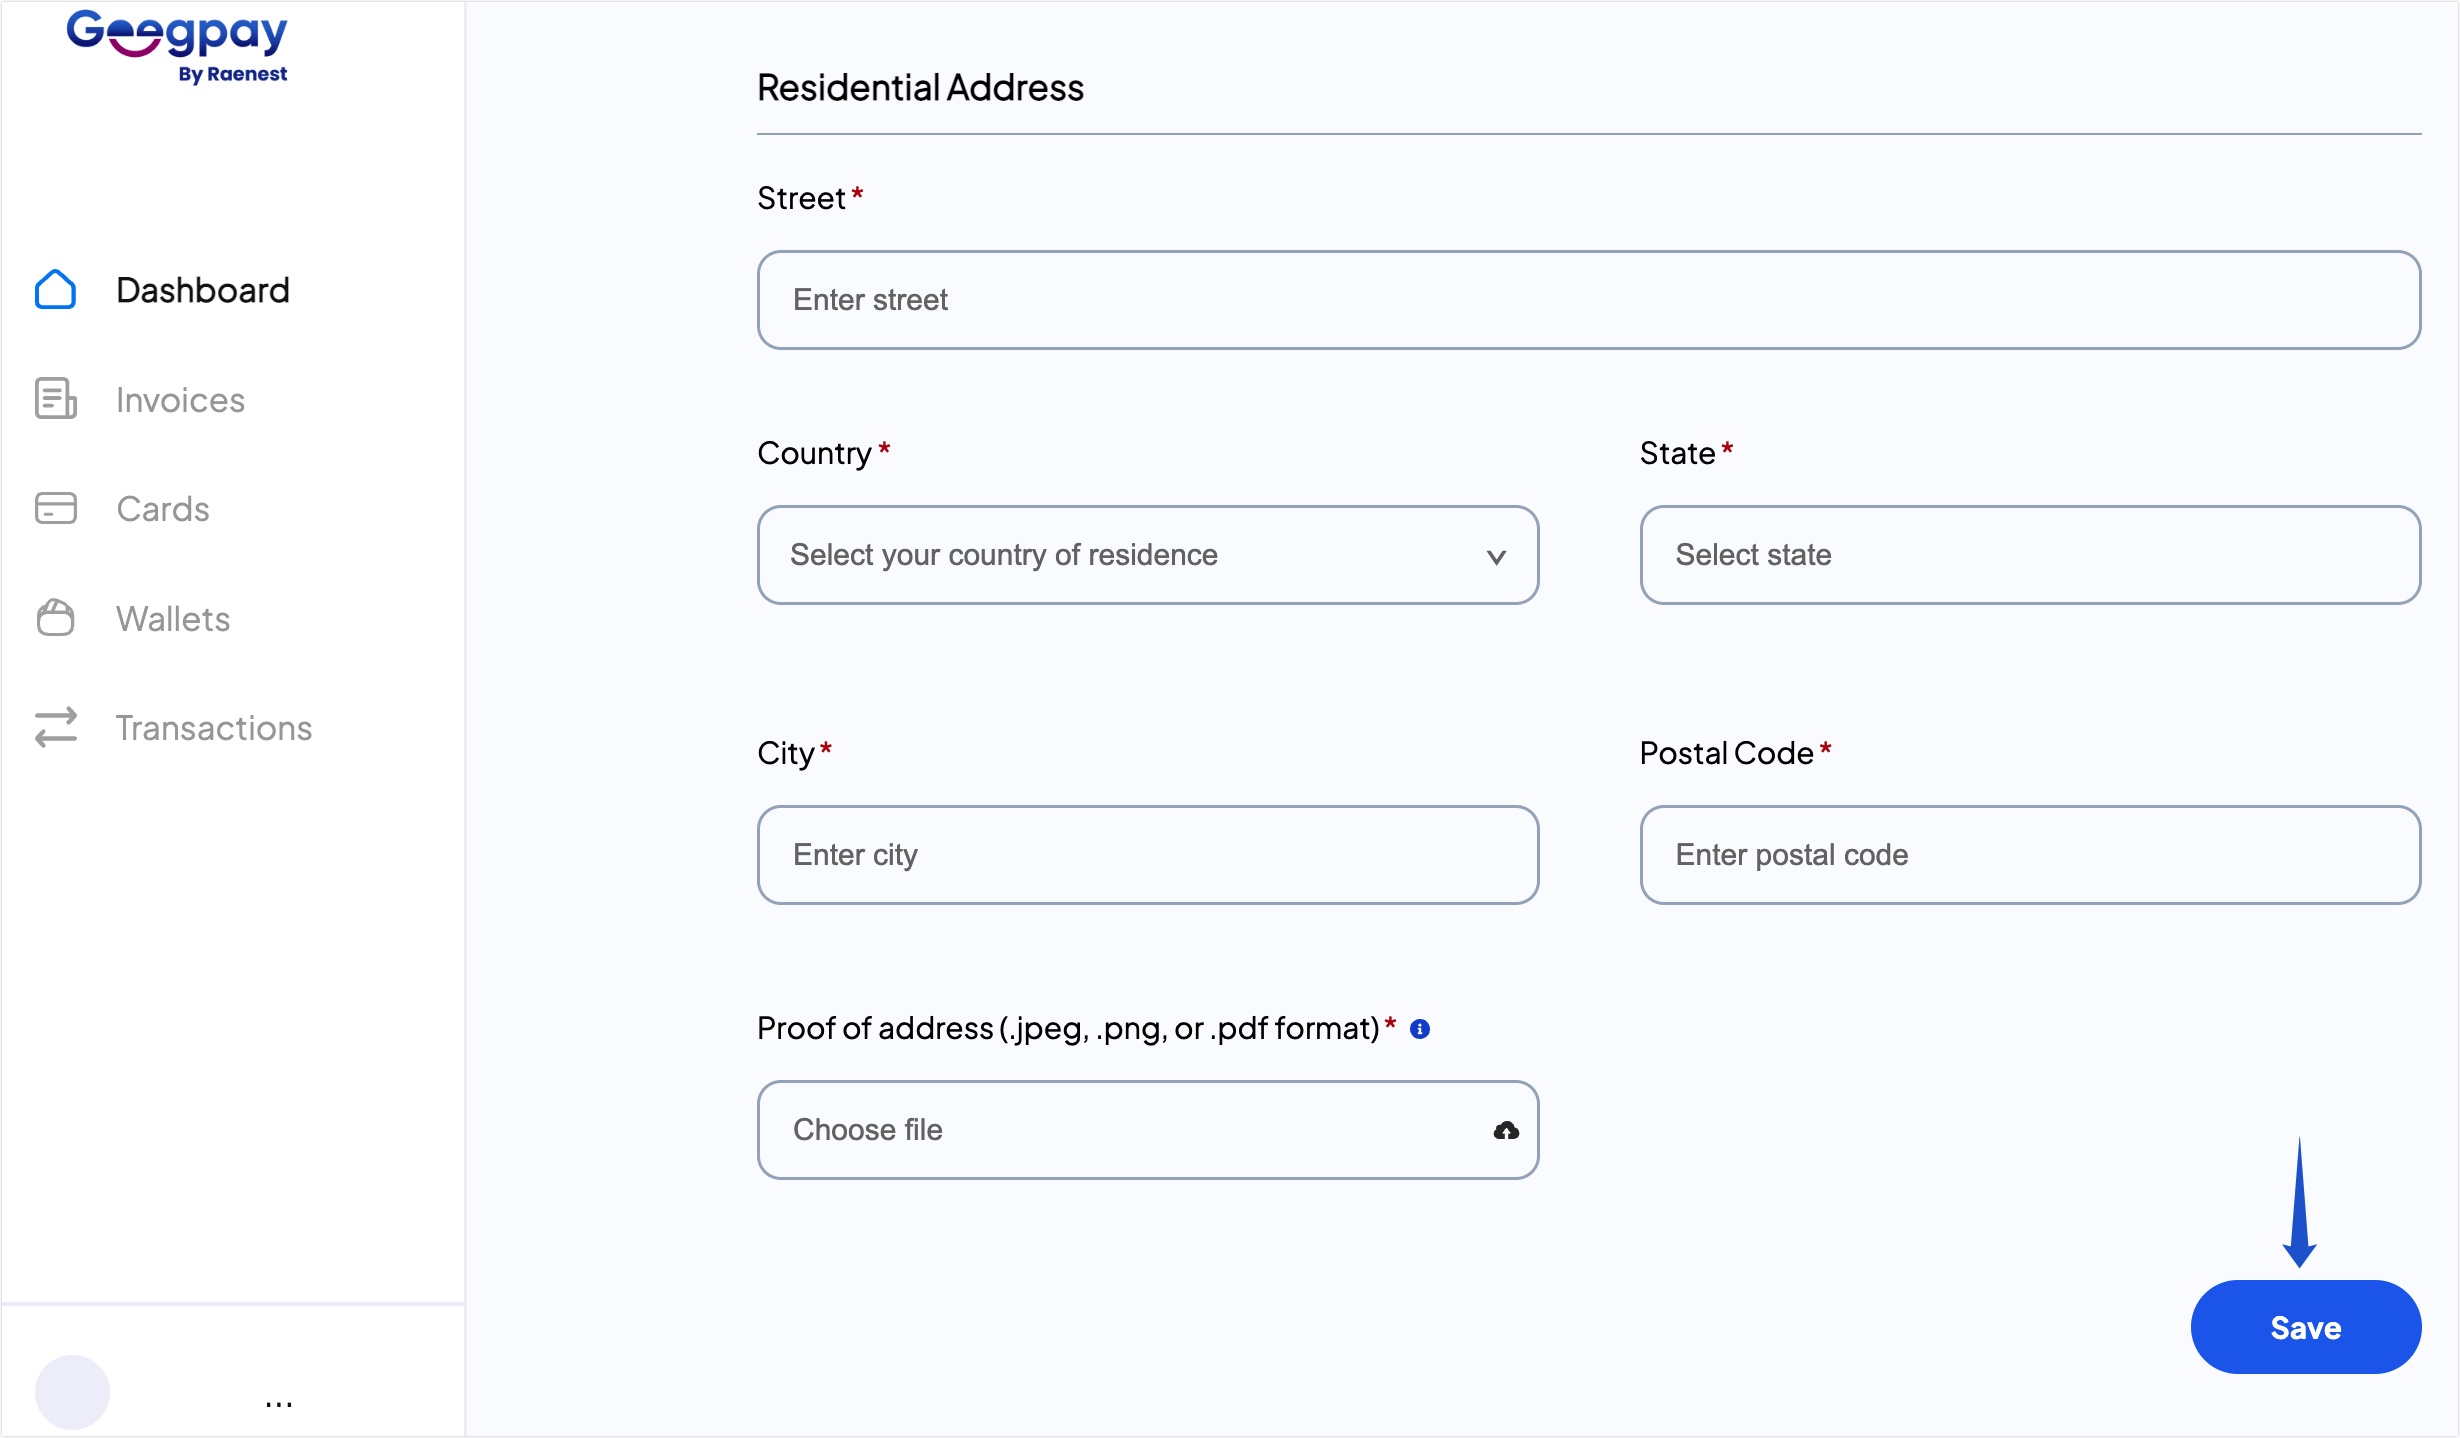
Next, enter your address information as it appears on your utility bill. You’ll also need to upload a means to verify your address, such as your utility bill or bank statement. Click the Save button to continue.
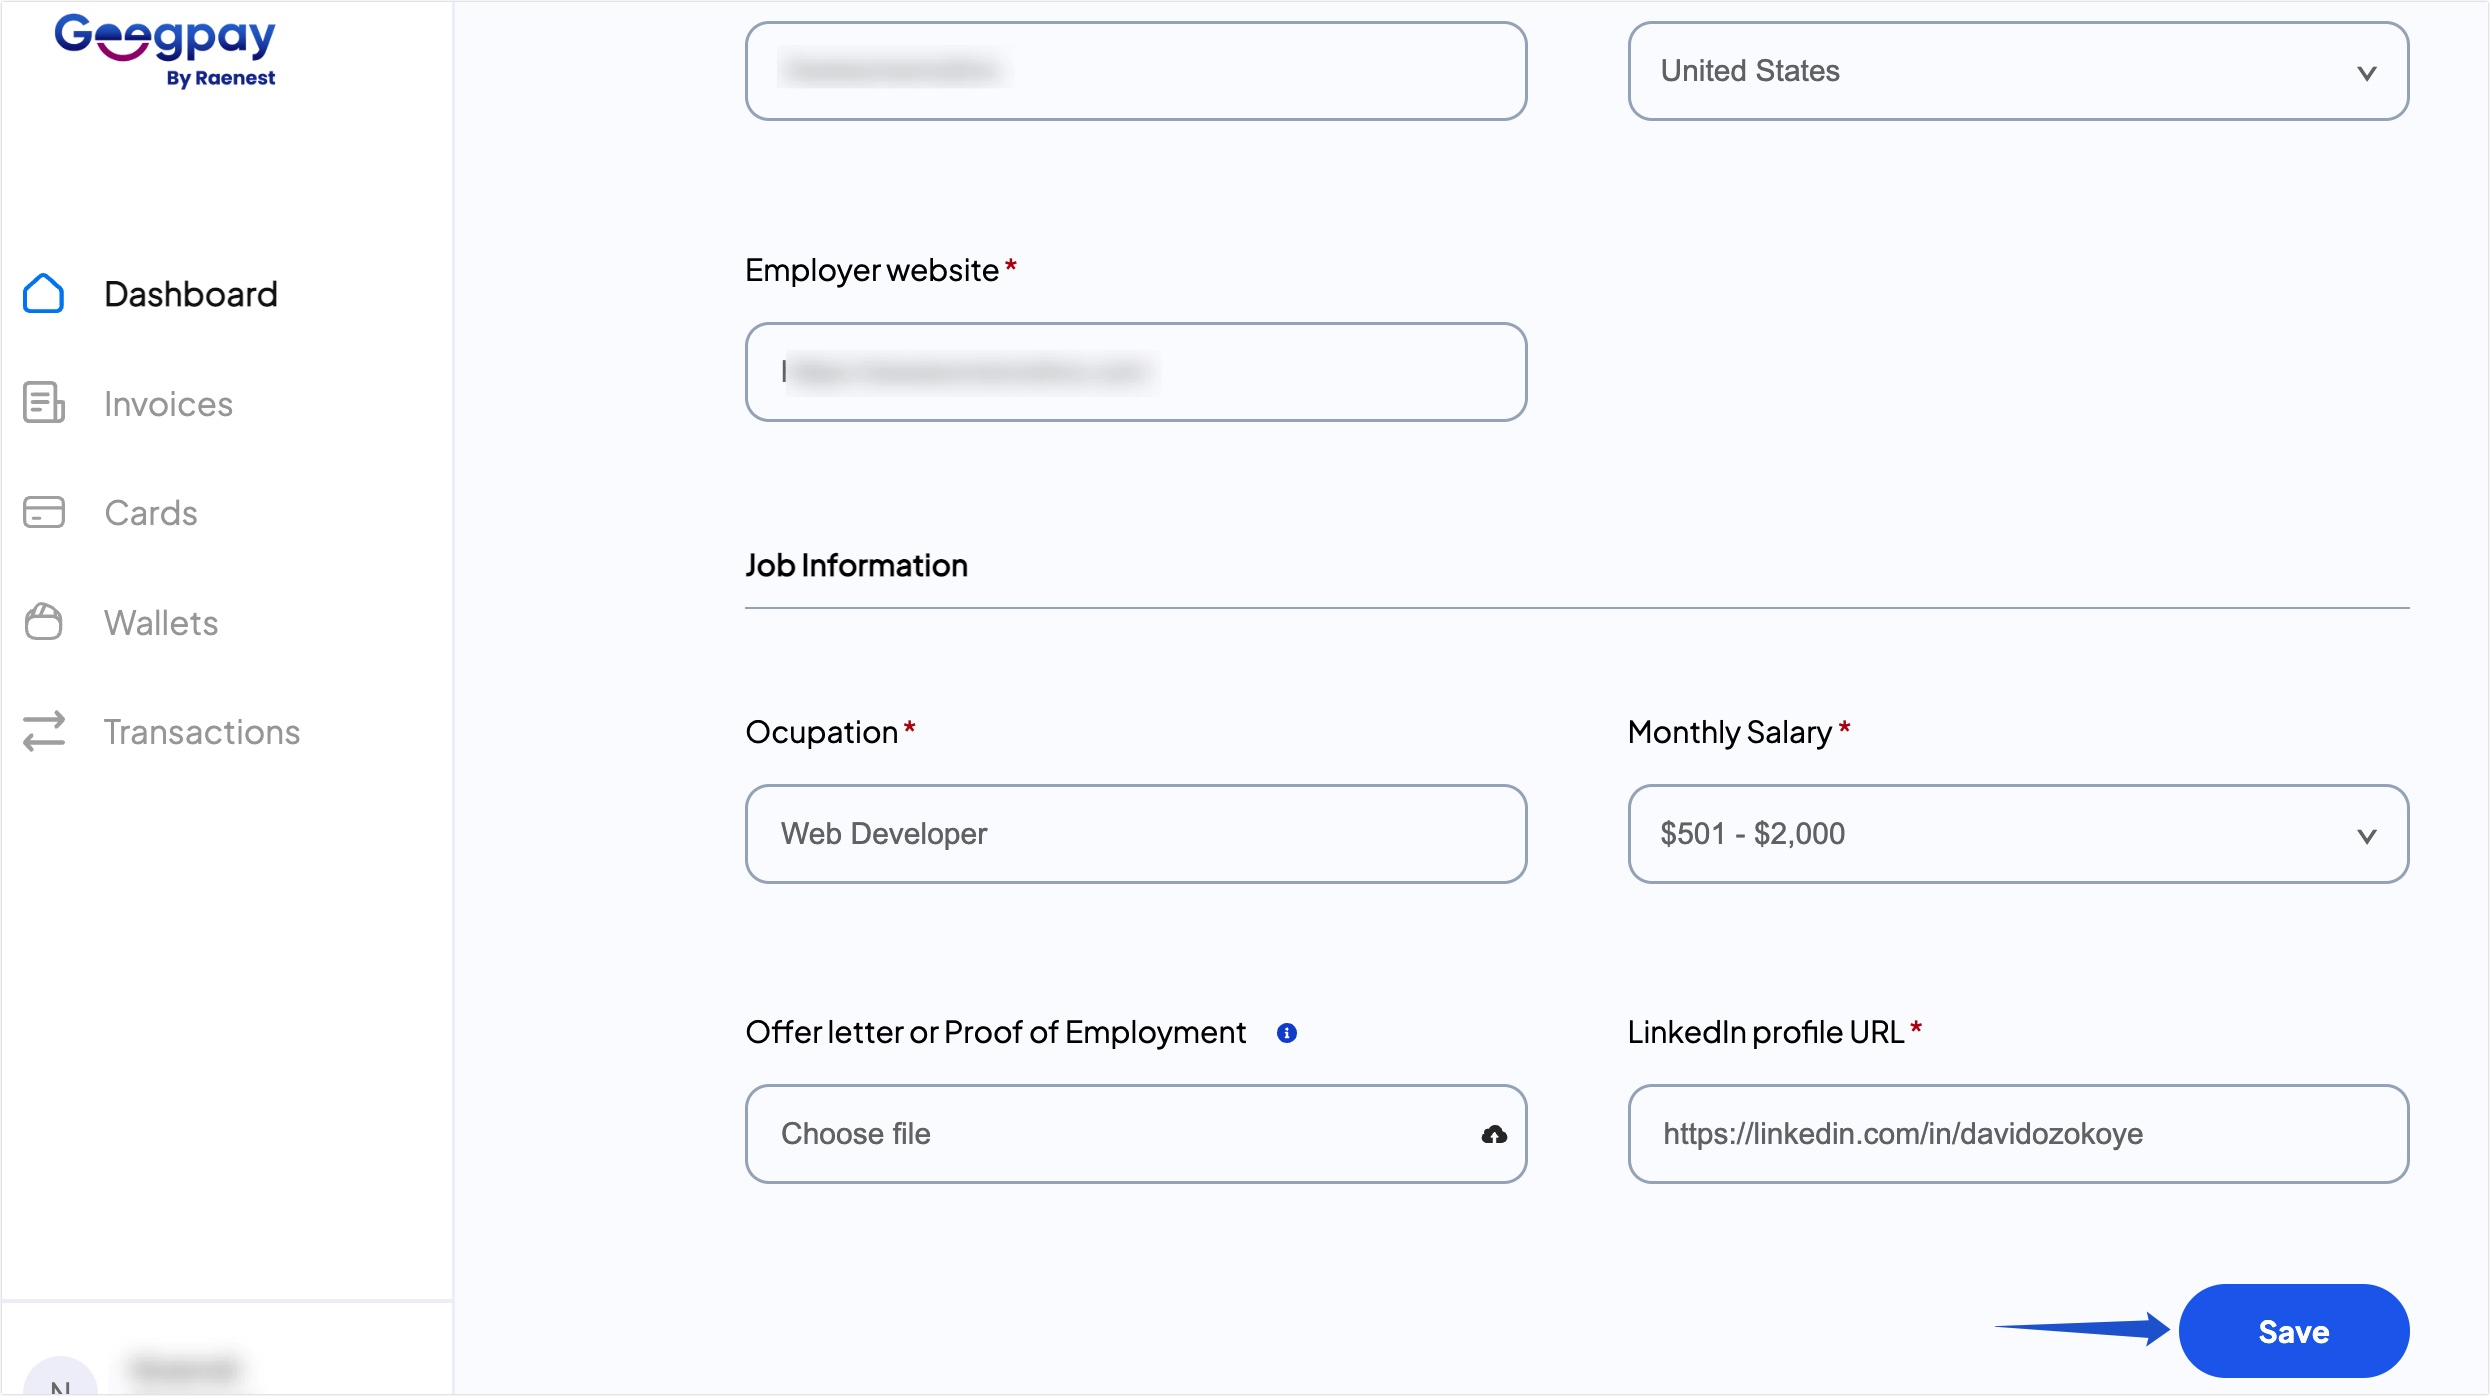
Under Employment Details, enter information about your employer (if you’re a remote worker or a freelancer).
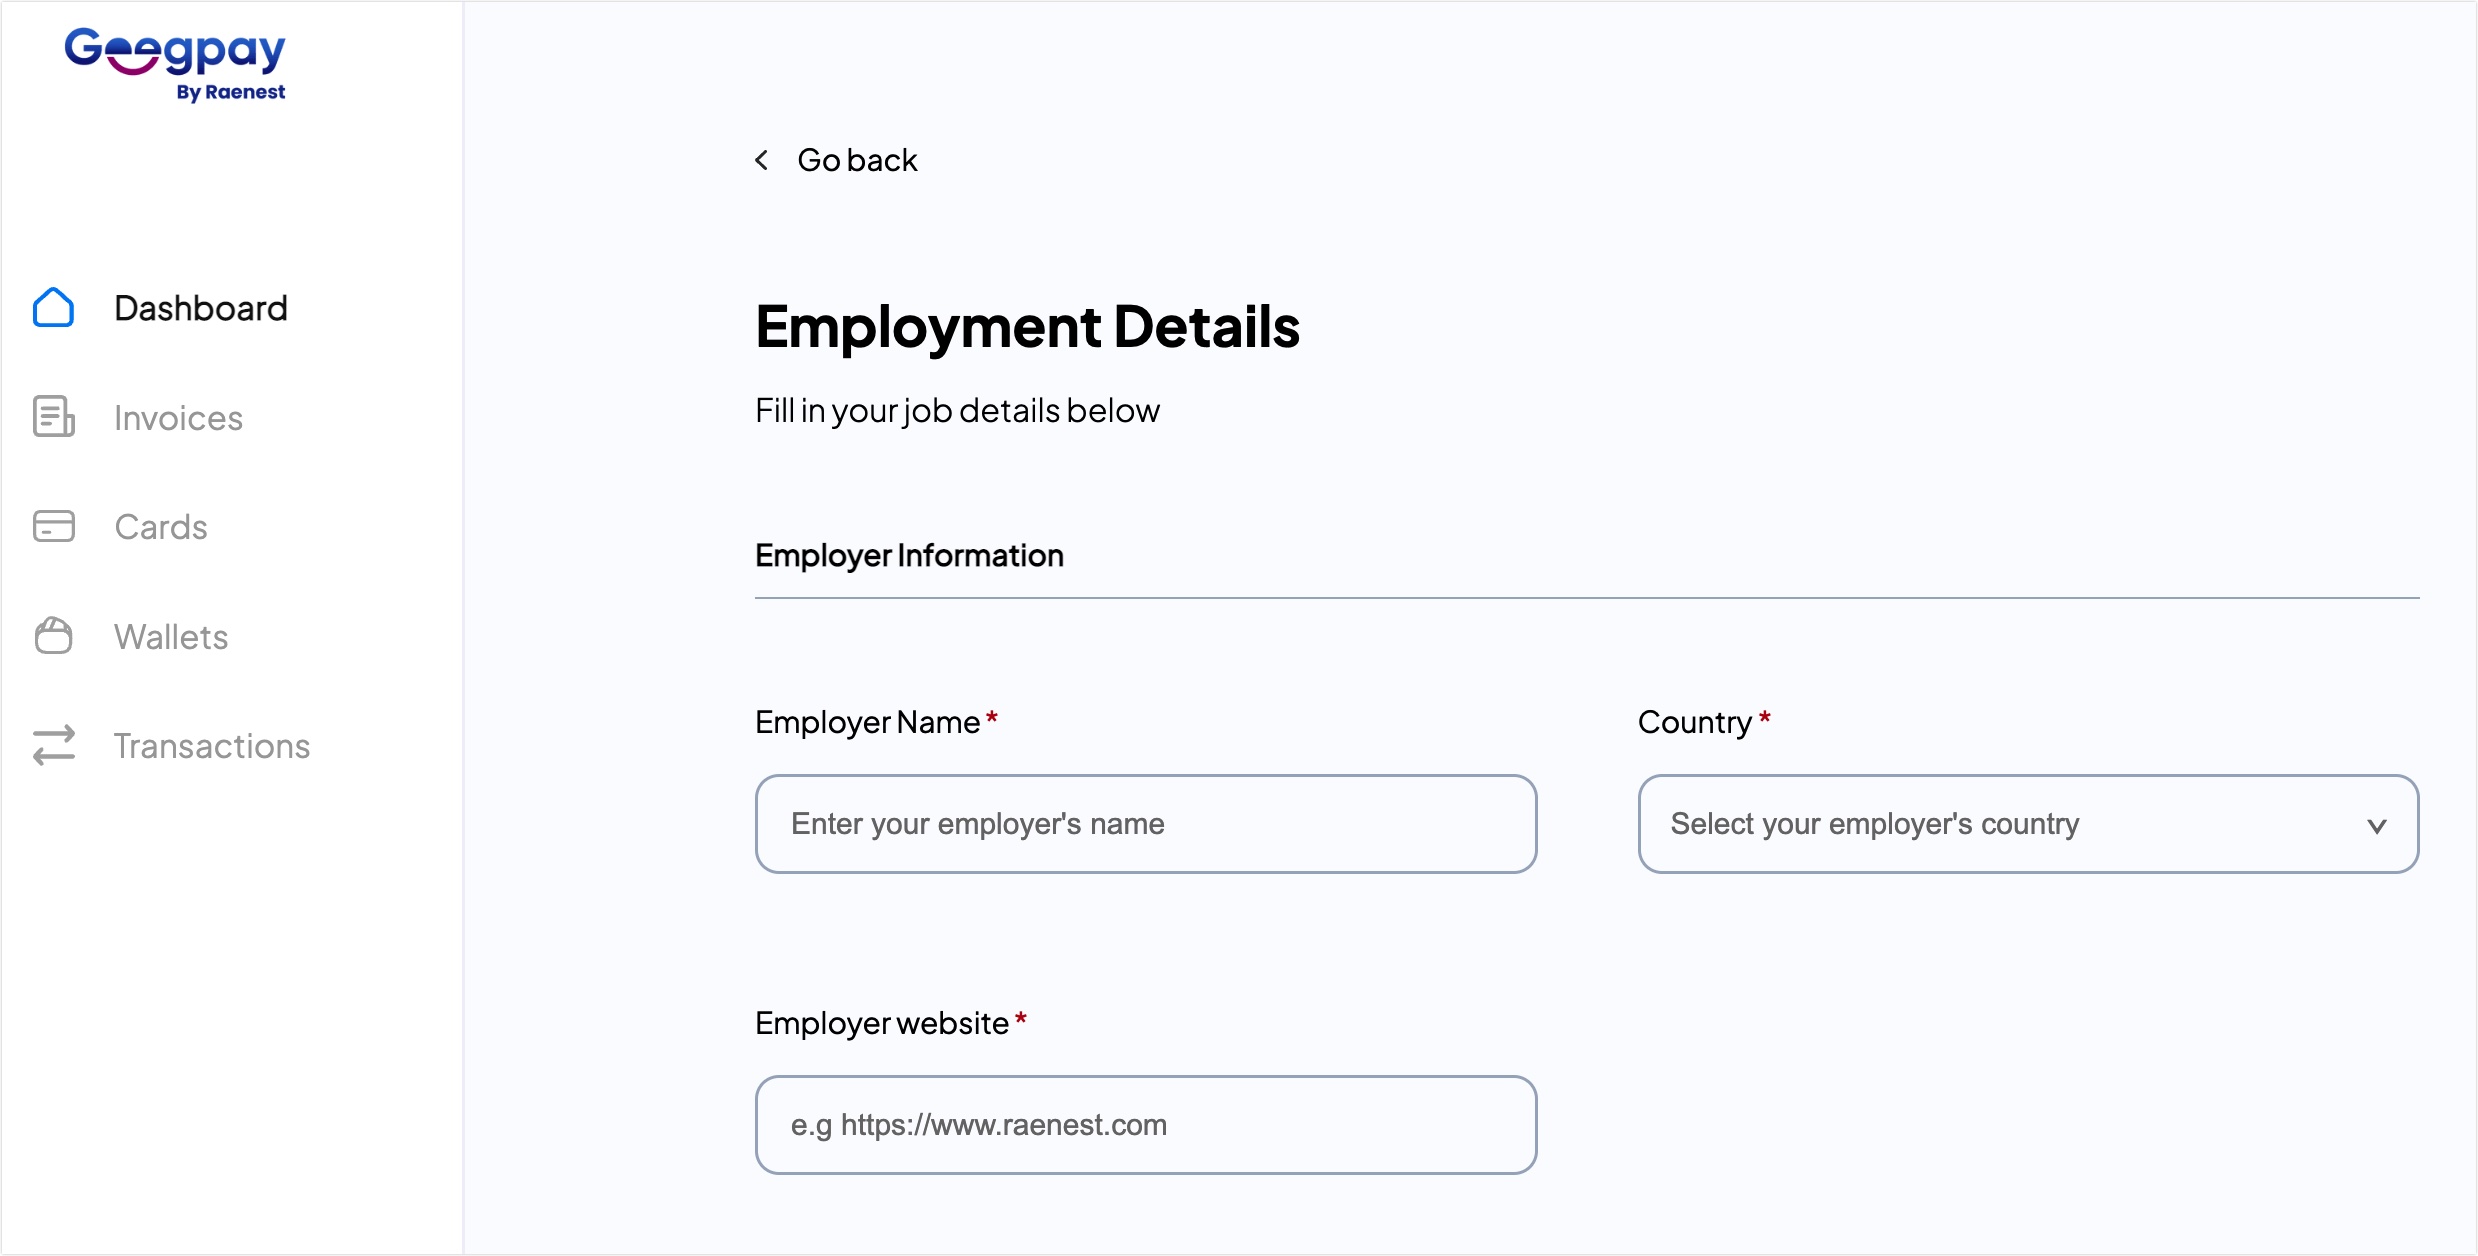
After that, enter your job description and LinkedIn profile to verify your online presence.
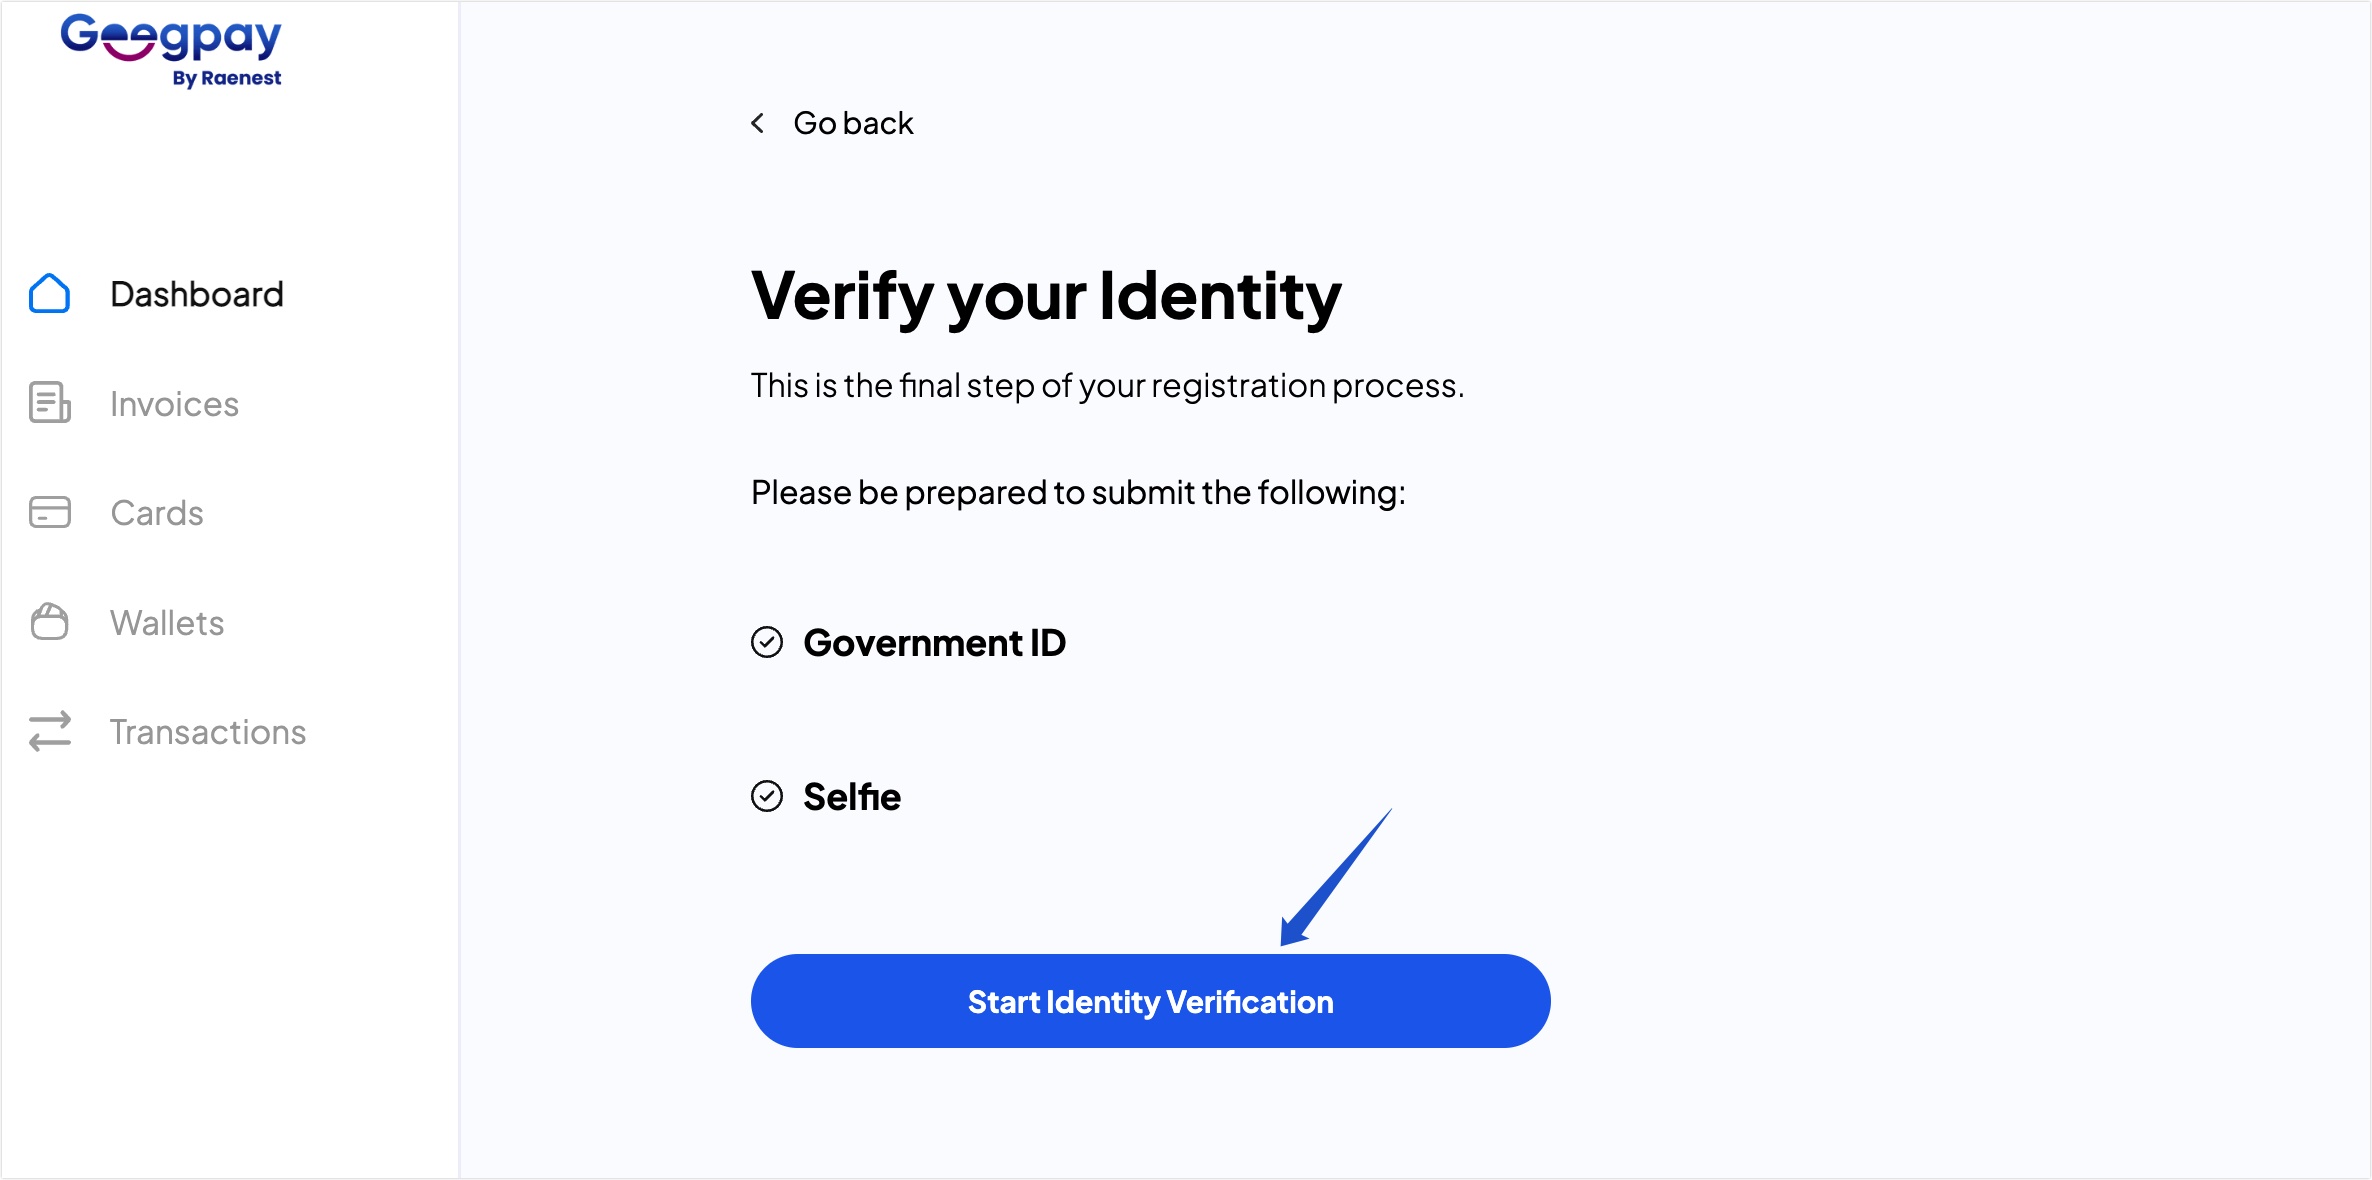
Now, you’ll need to verify your identity. This involves uploading a valid ID card and taking a selfie to verify your identity. To start, click on Start Identity Verification.
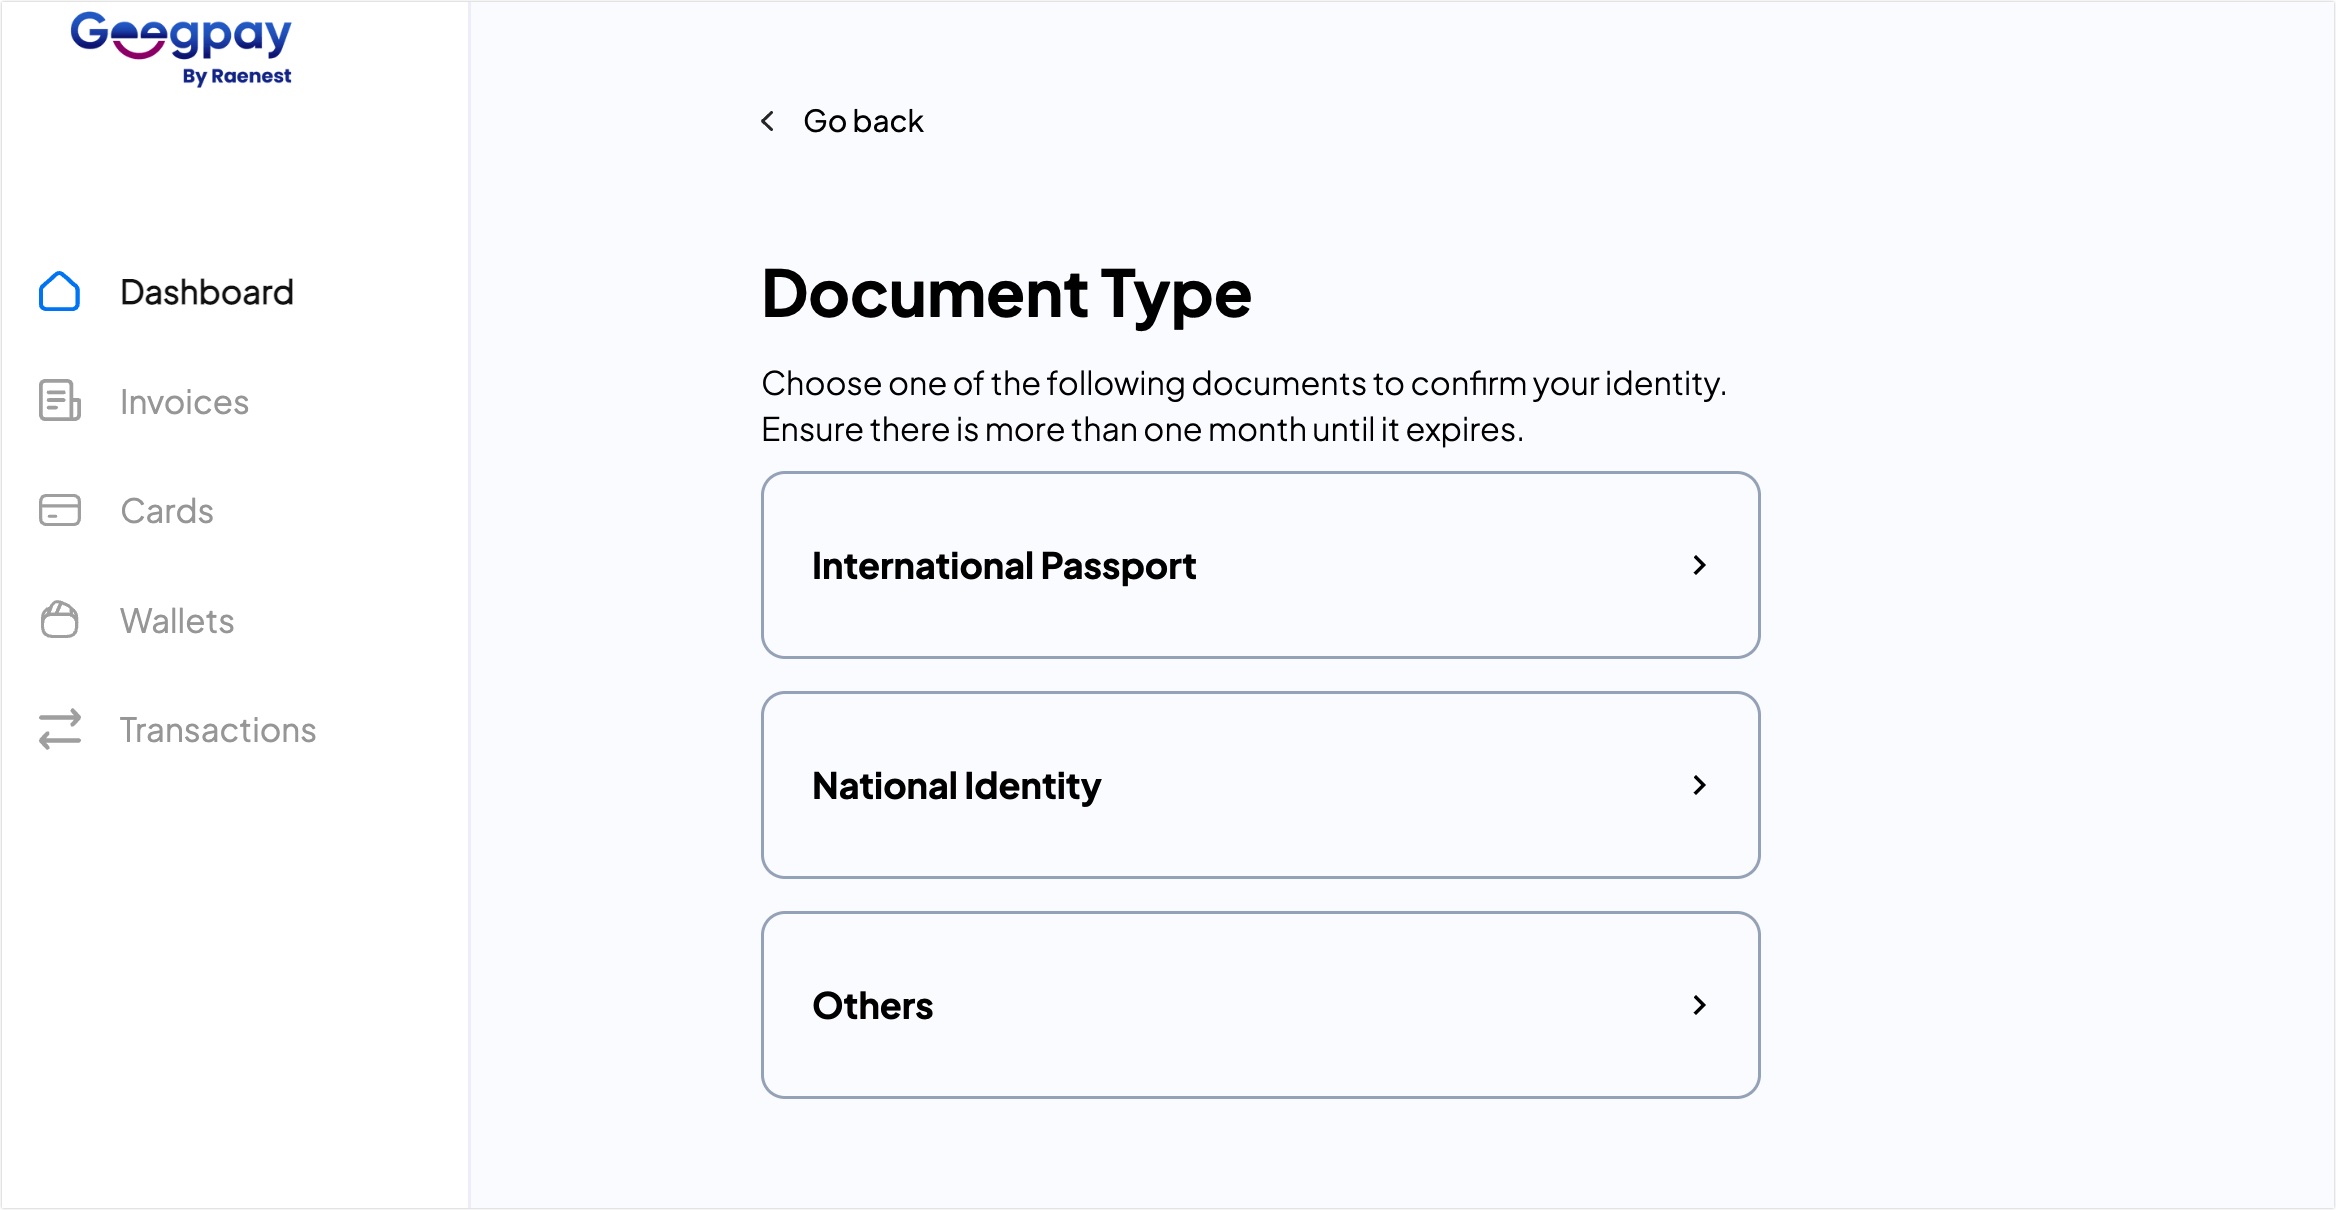
Under Document Type, select the type of ID you wish to use to verify your account.
Once you’ve chosen a verification method, proceed to upload your ID card and take a selfie. Your account should be under review.
After the verification completes, you’ll be able to request virtual foreign bank accounts from your Geegpay wallet.
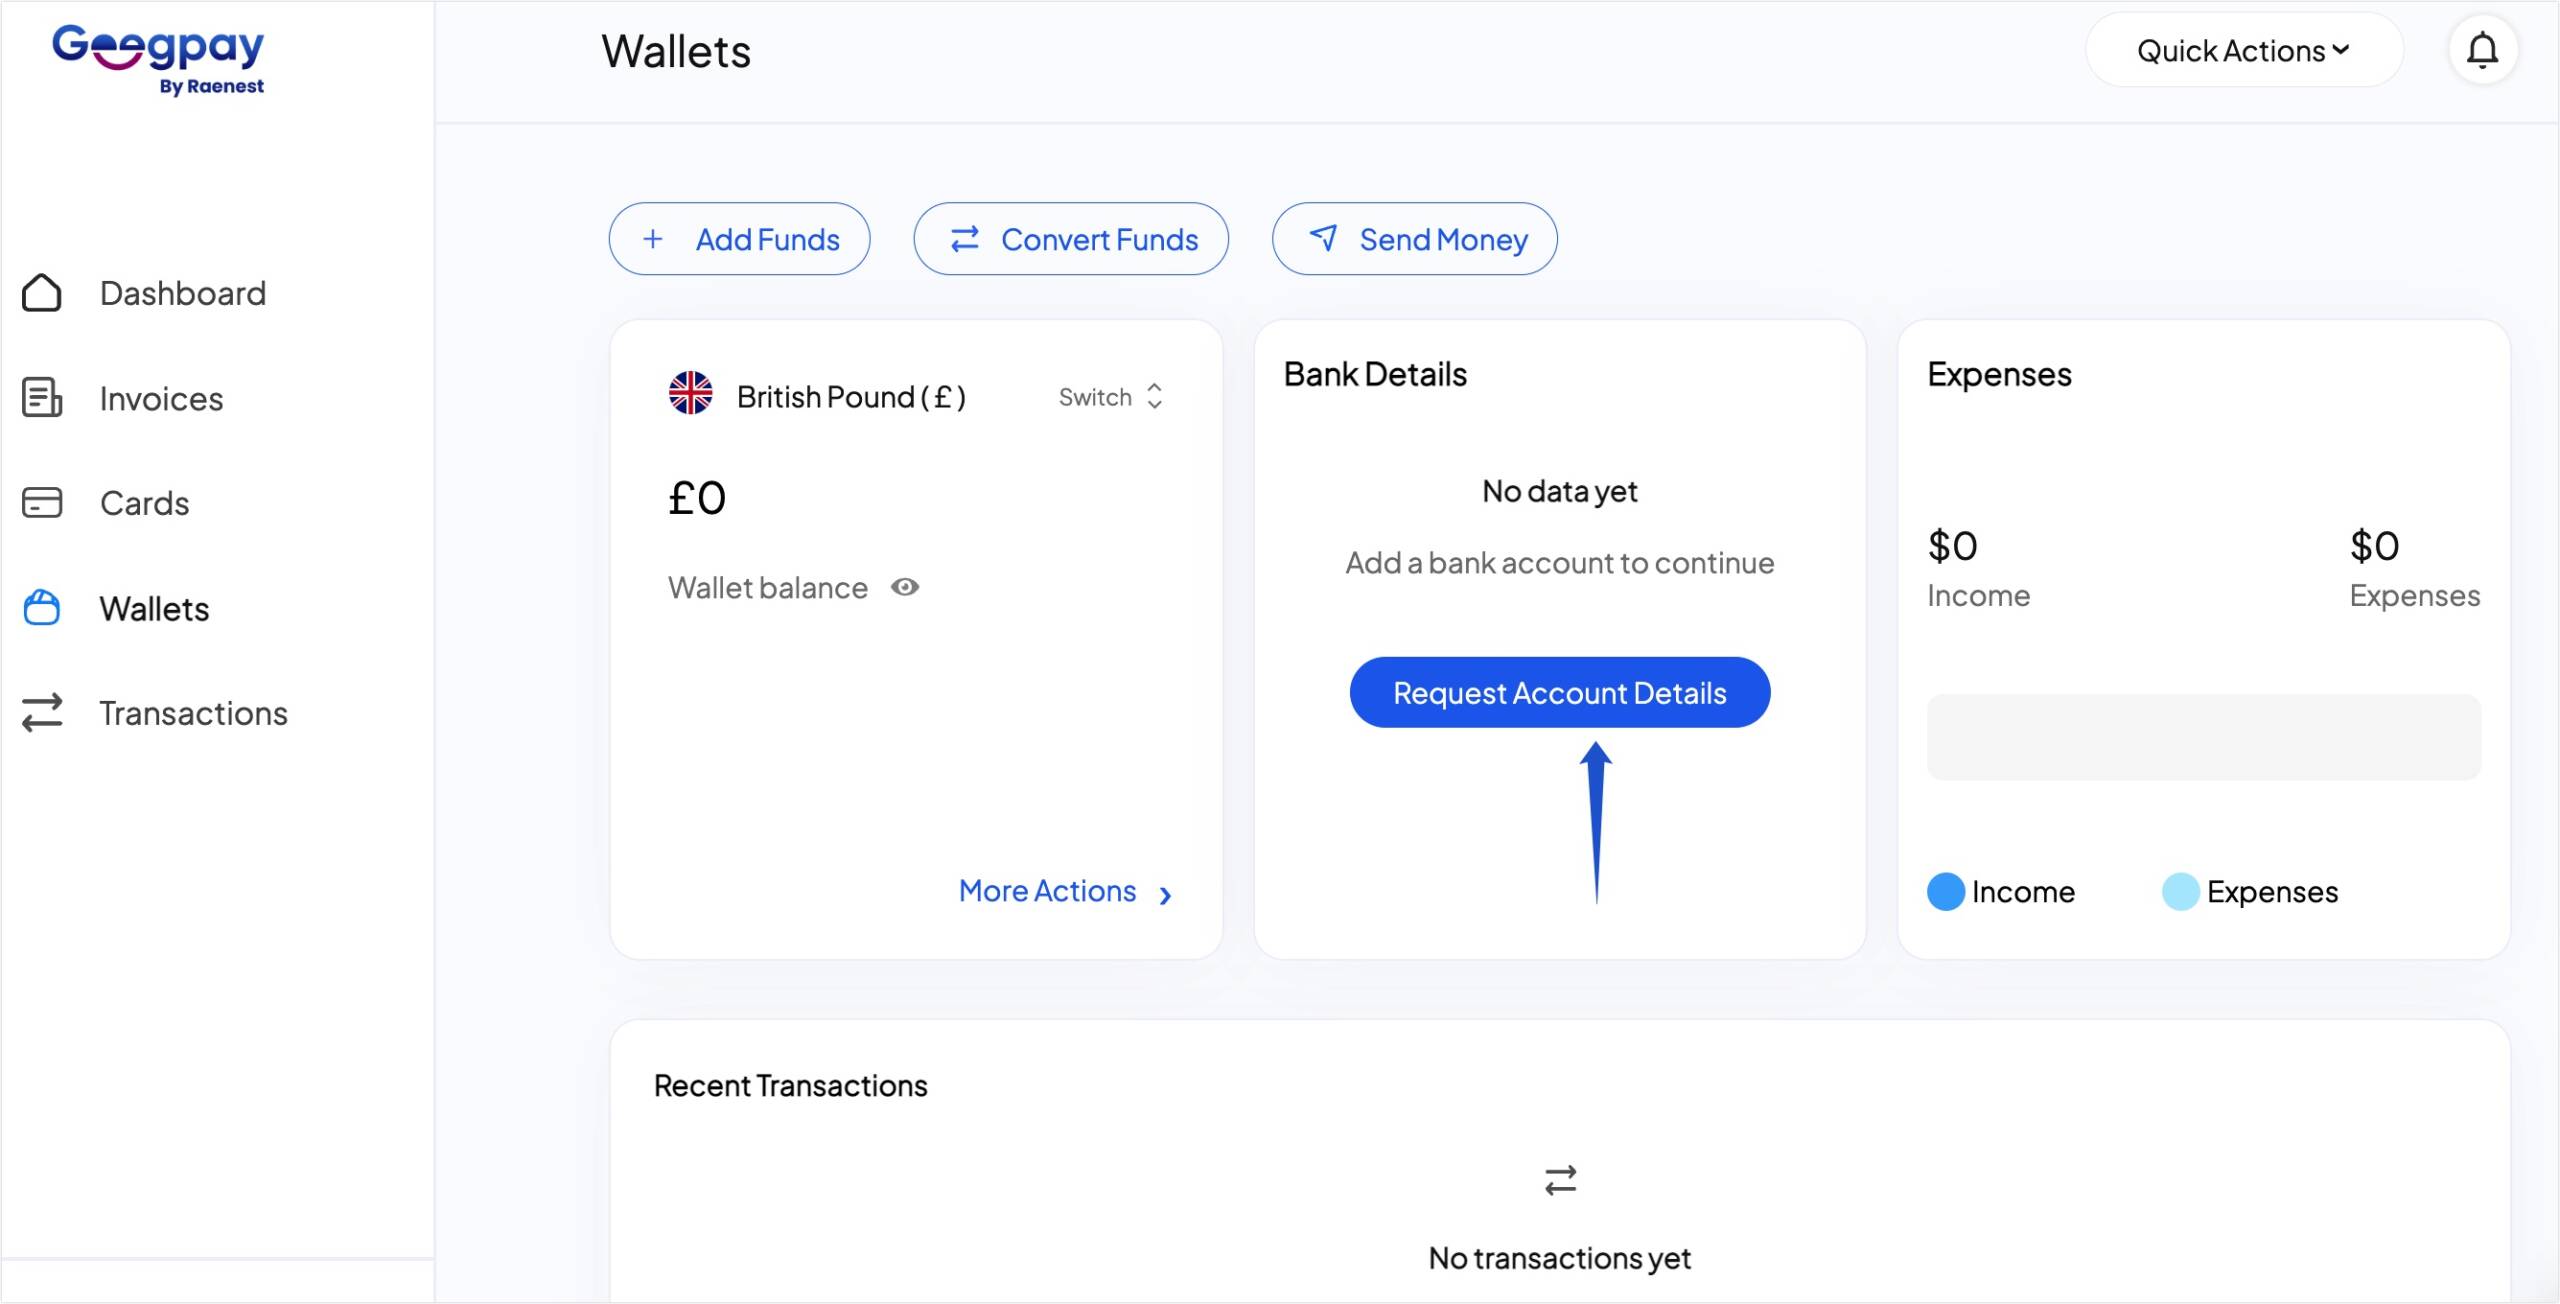
Requesting a USD Bank Account
To request an account, select the country you’d like to request an account to view its details.
On the account details page, click on Request Account Details.
After that, click on Create to request your account.
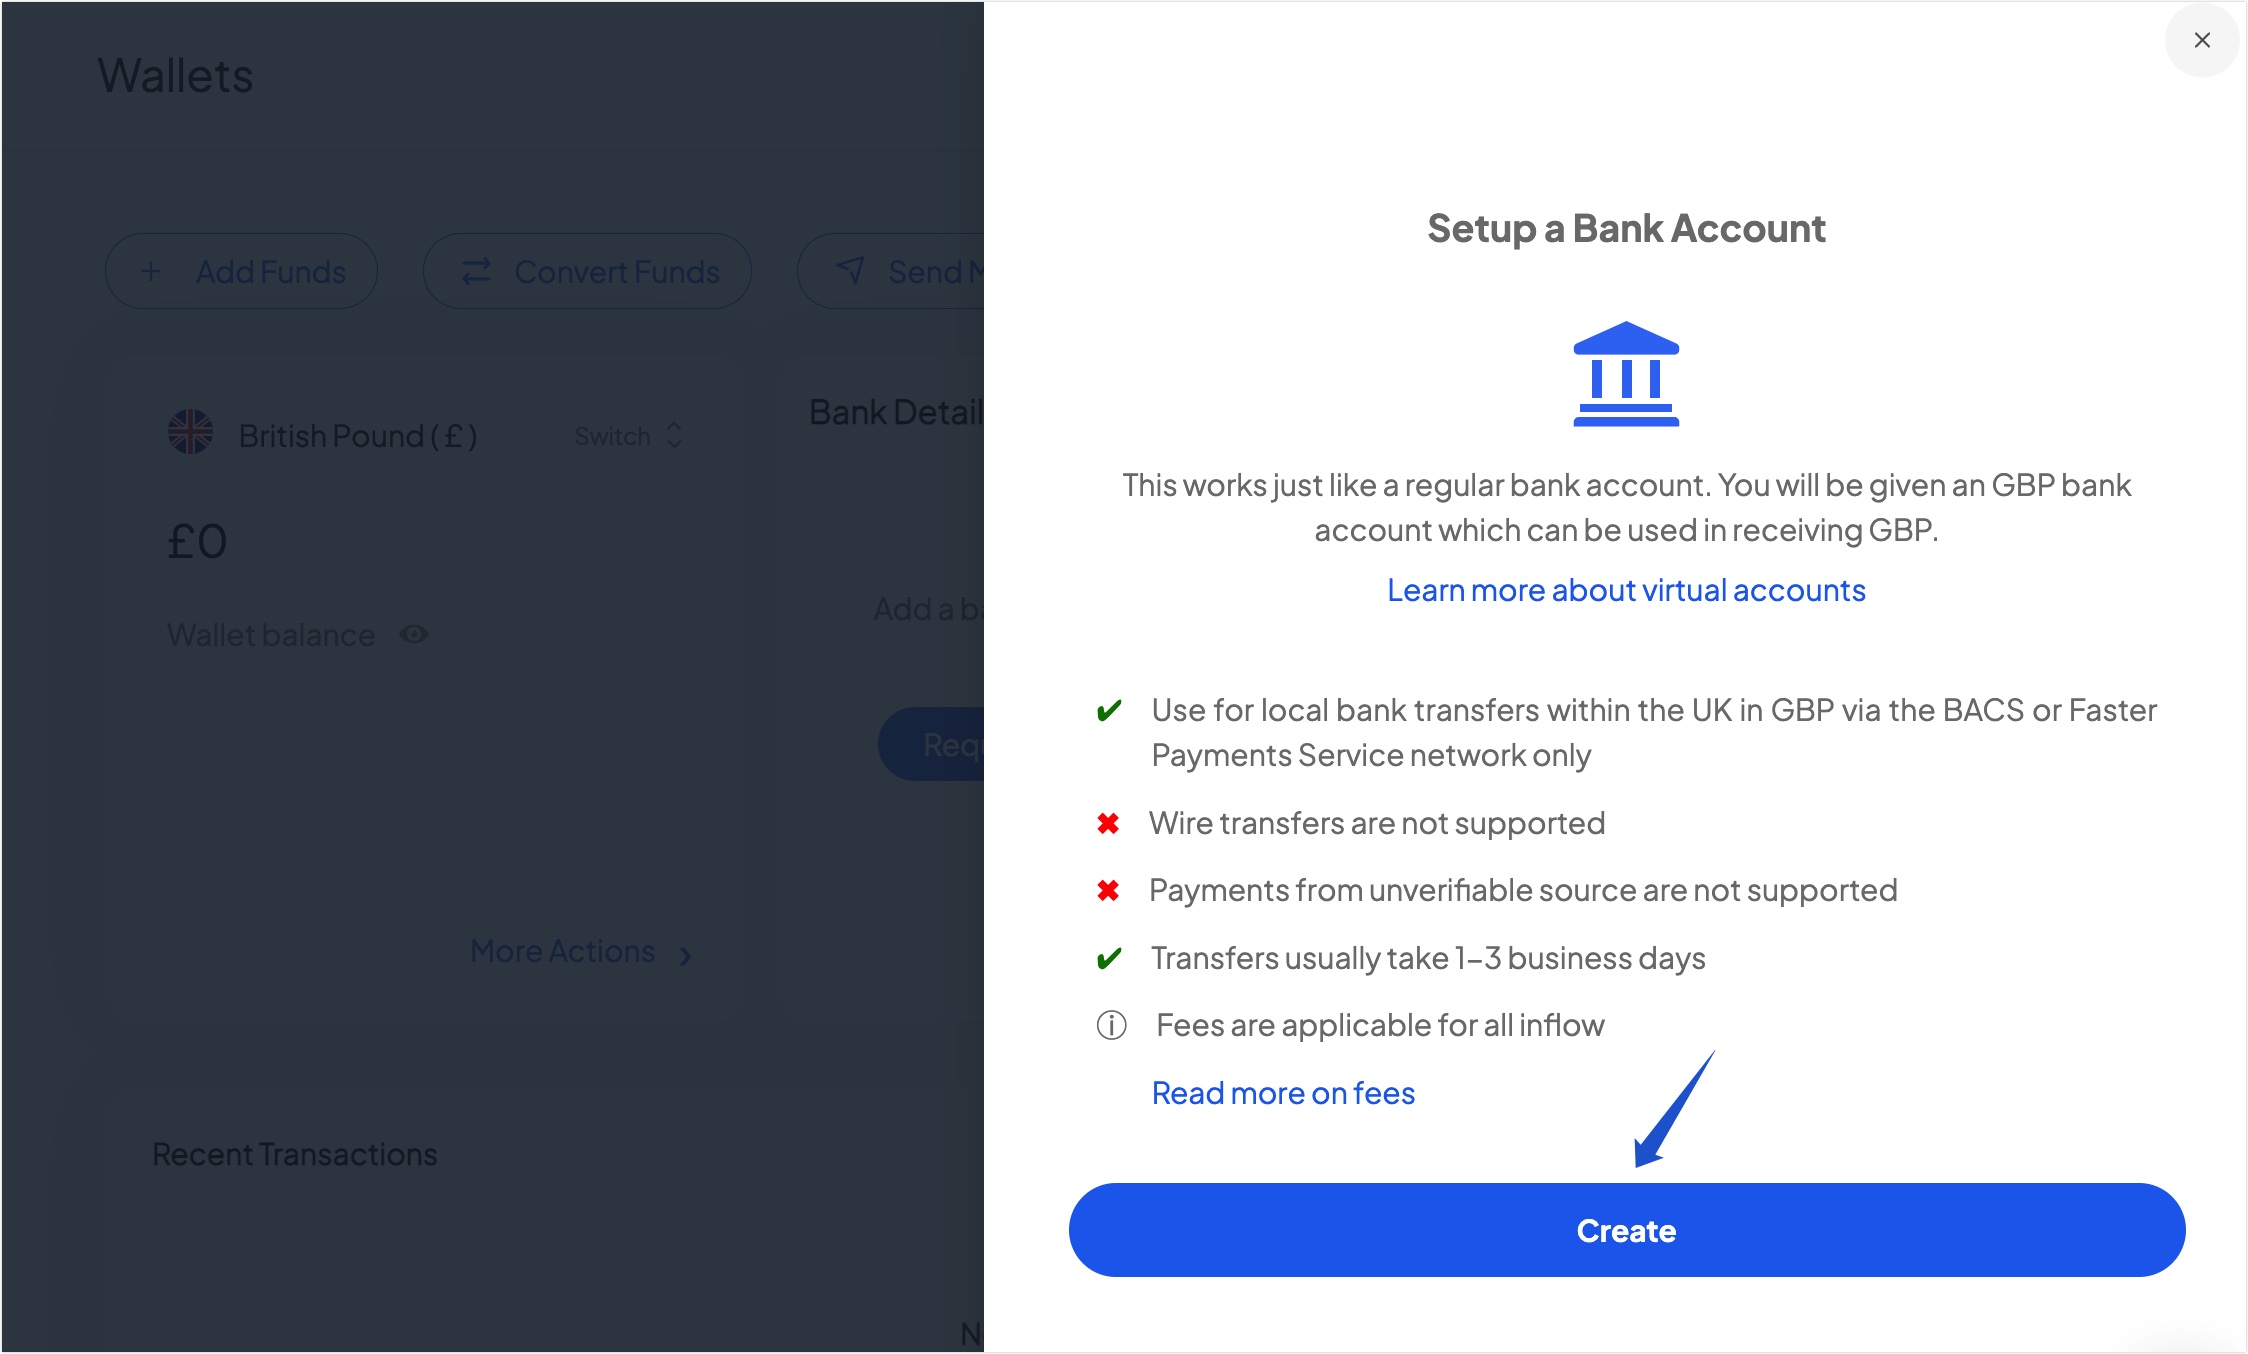
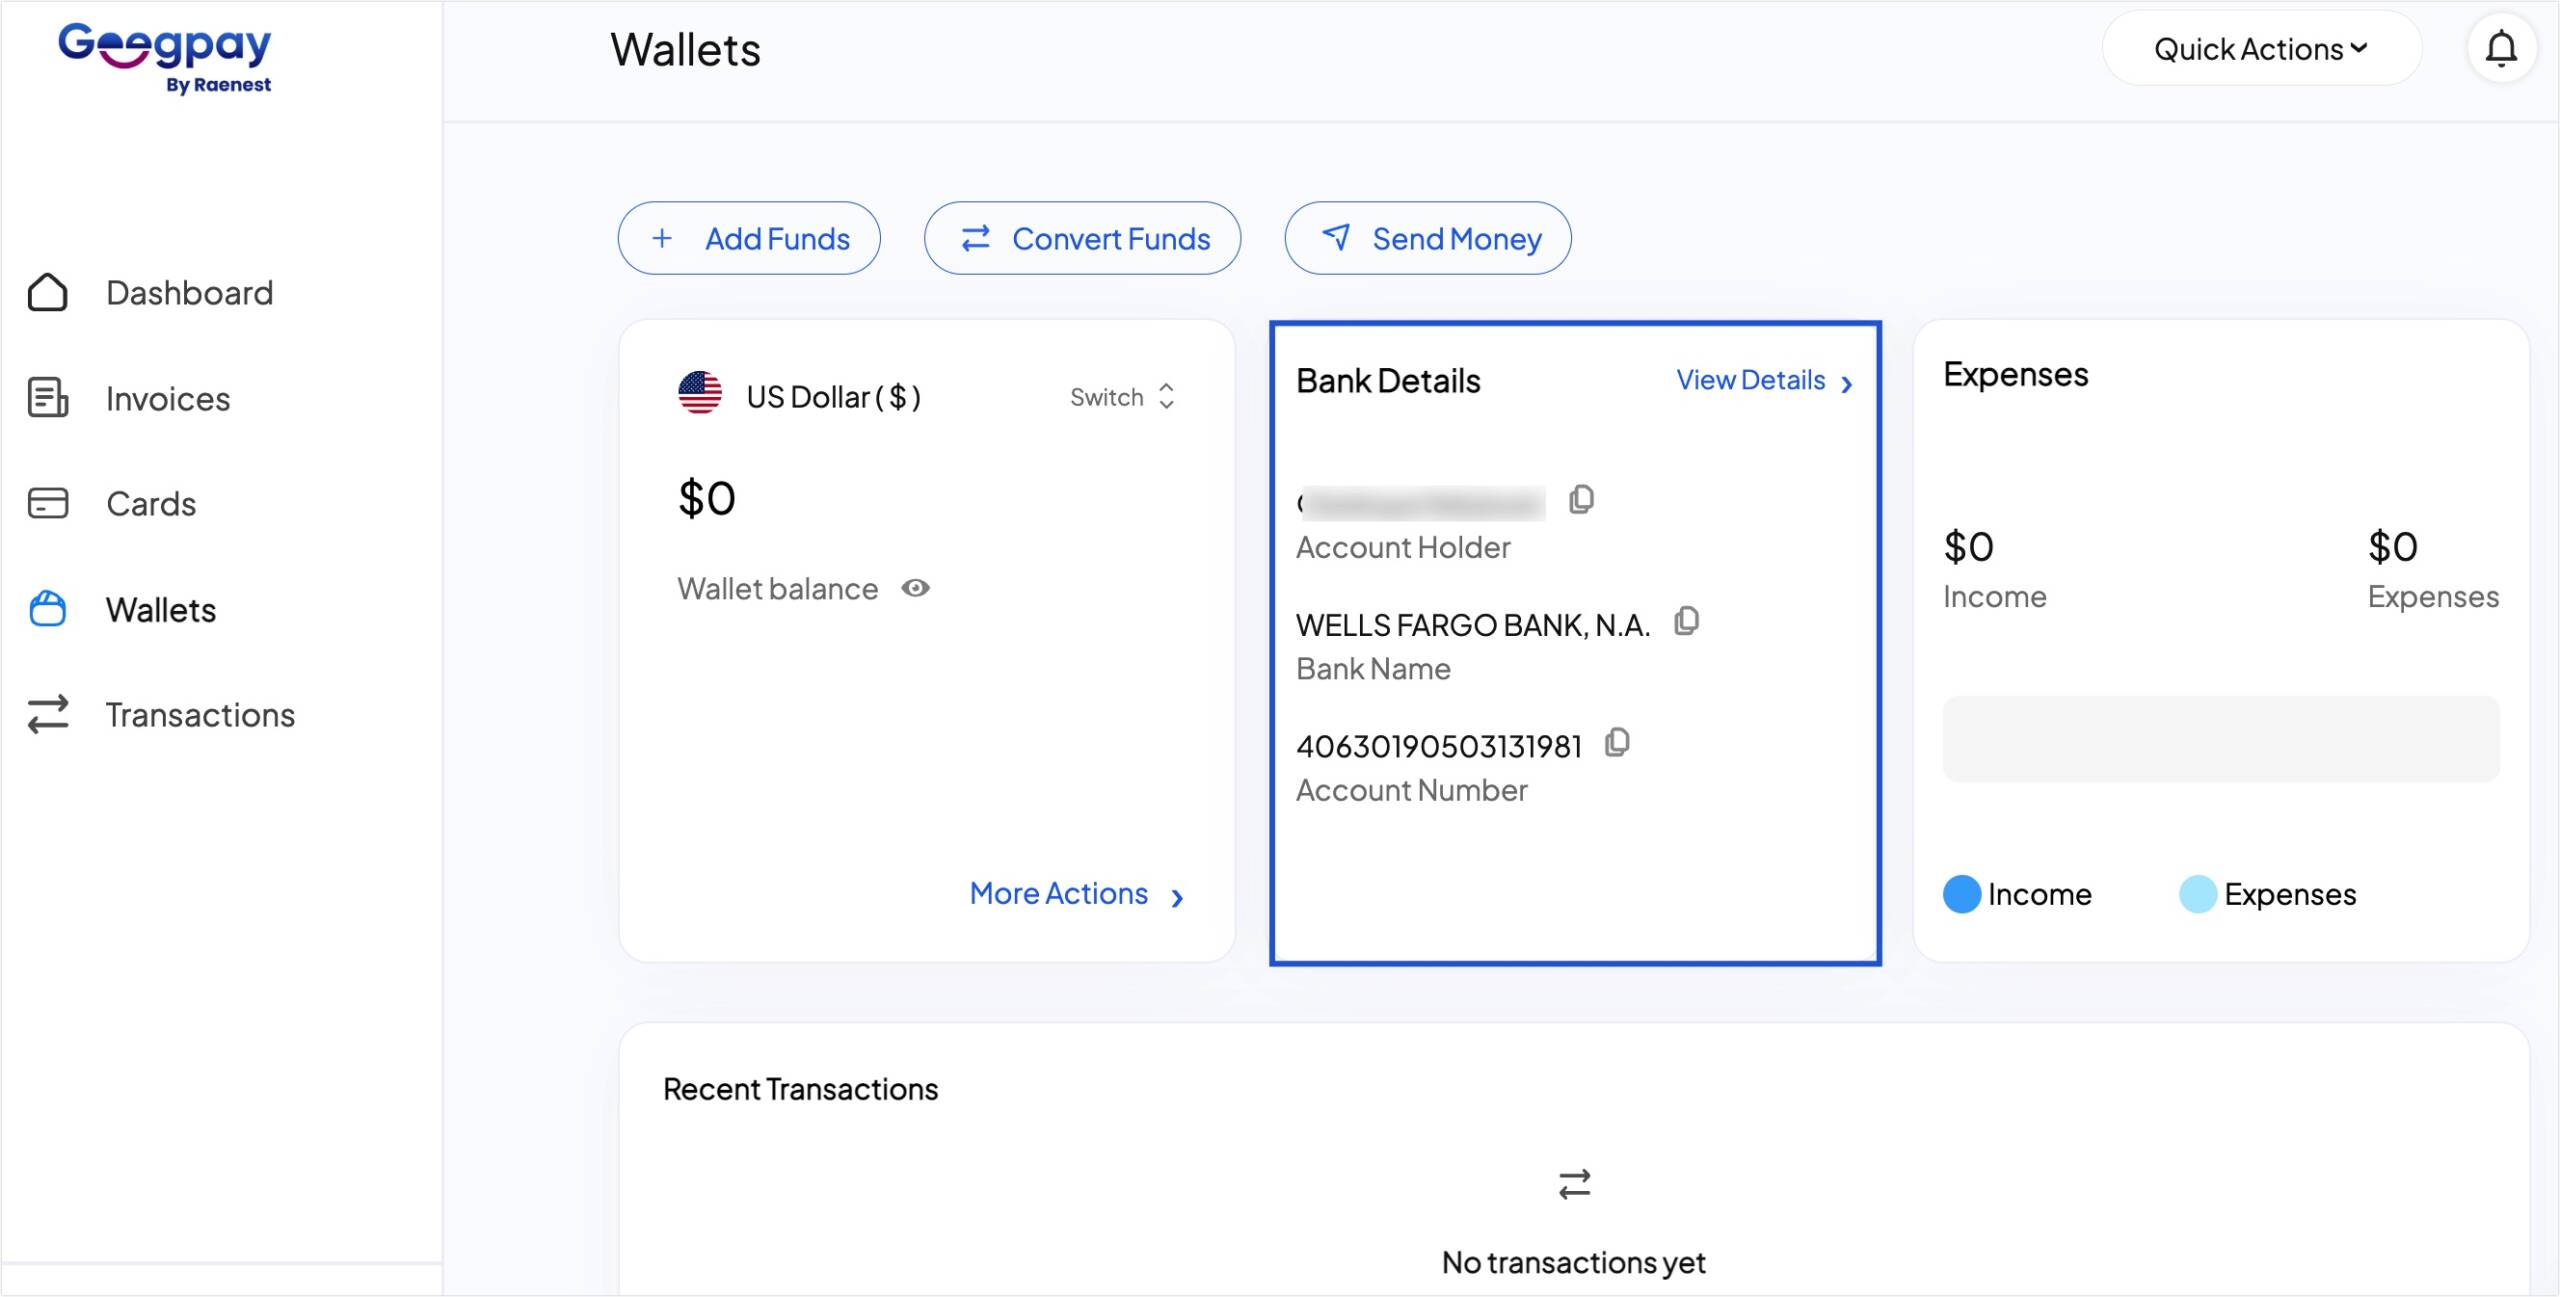
Geegpay will generate a virtual foreign bank account that you can use to receive payments from foreign clients.
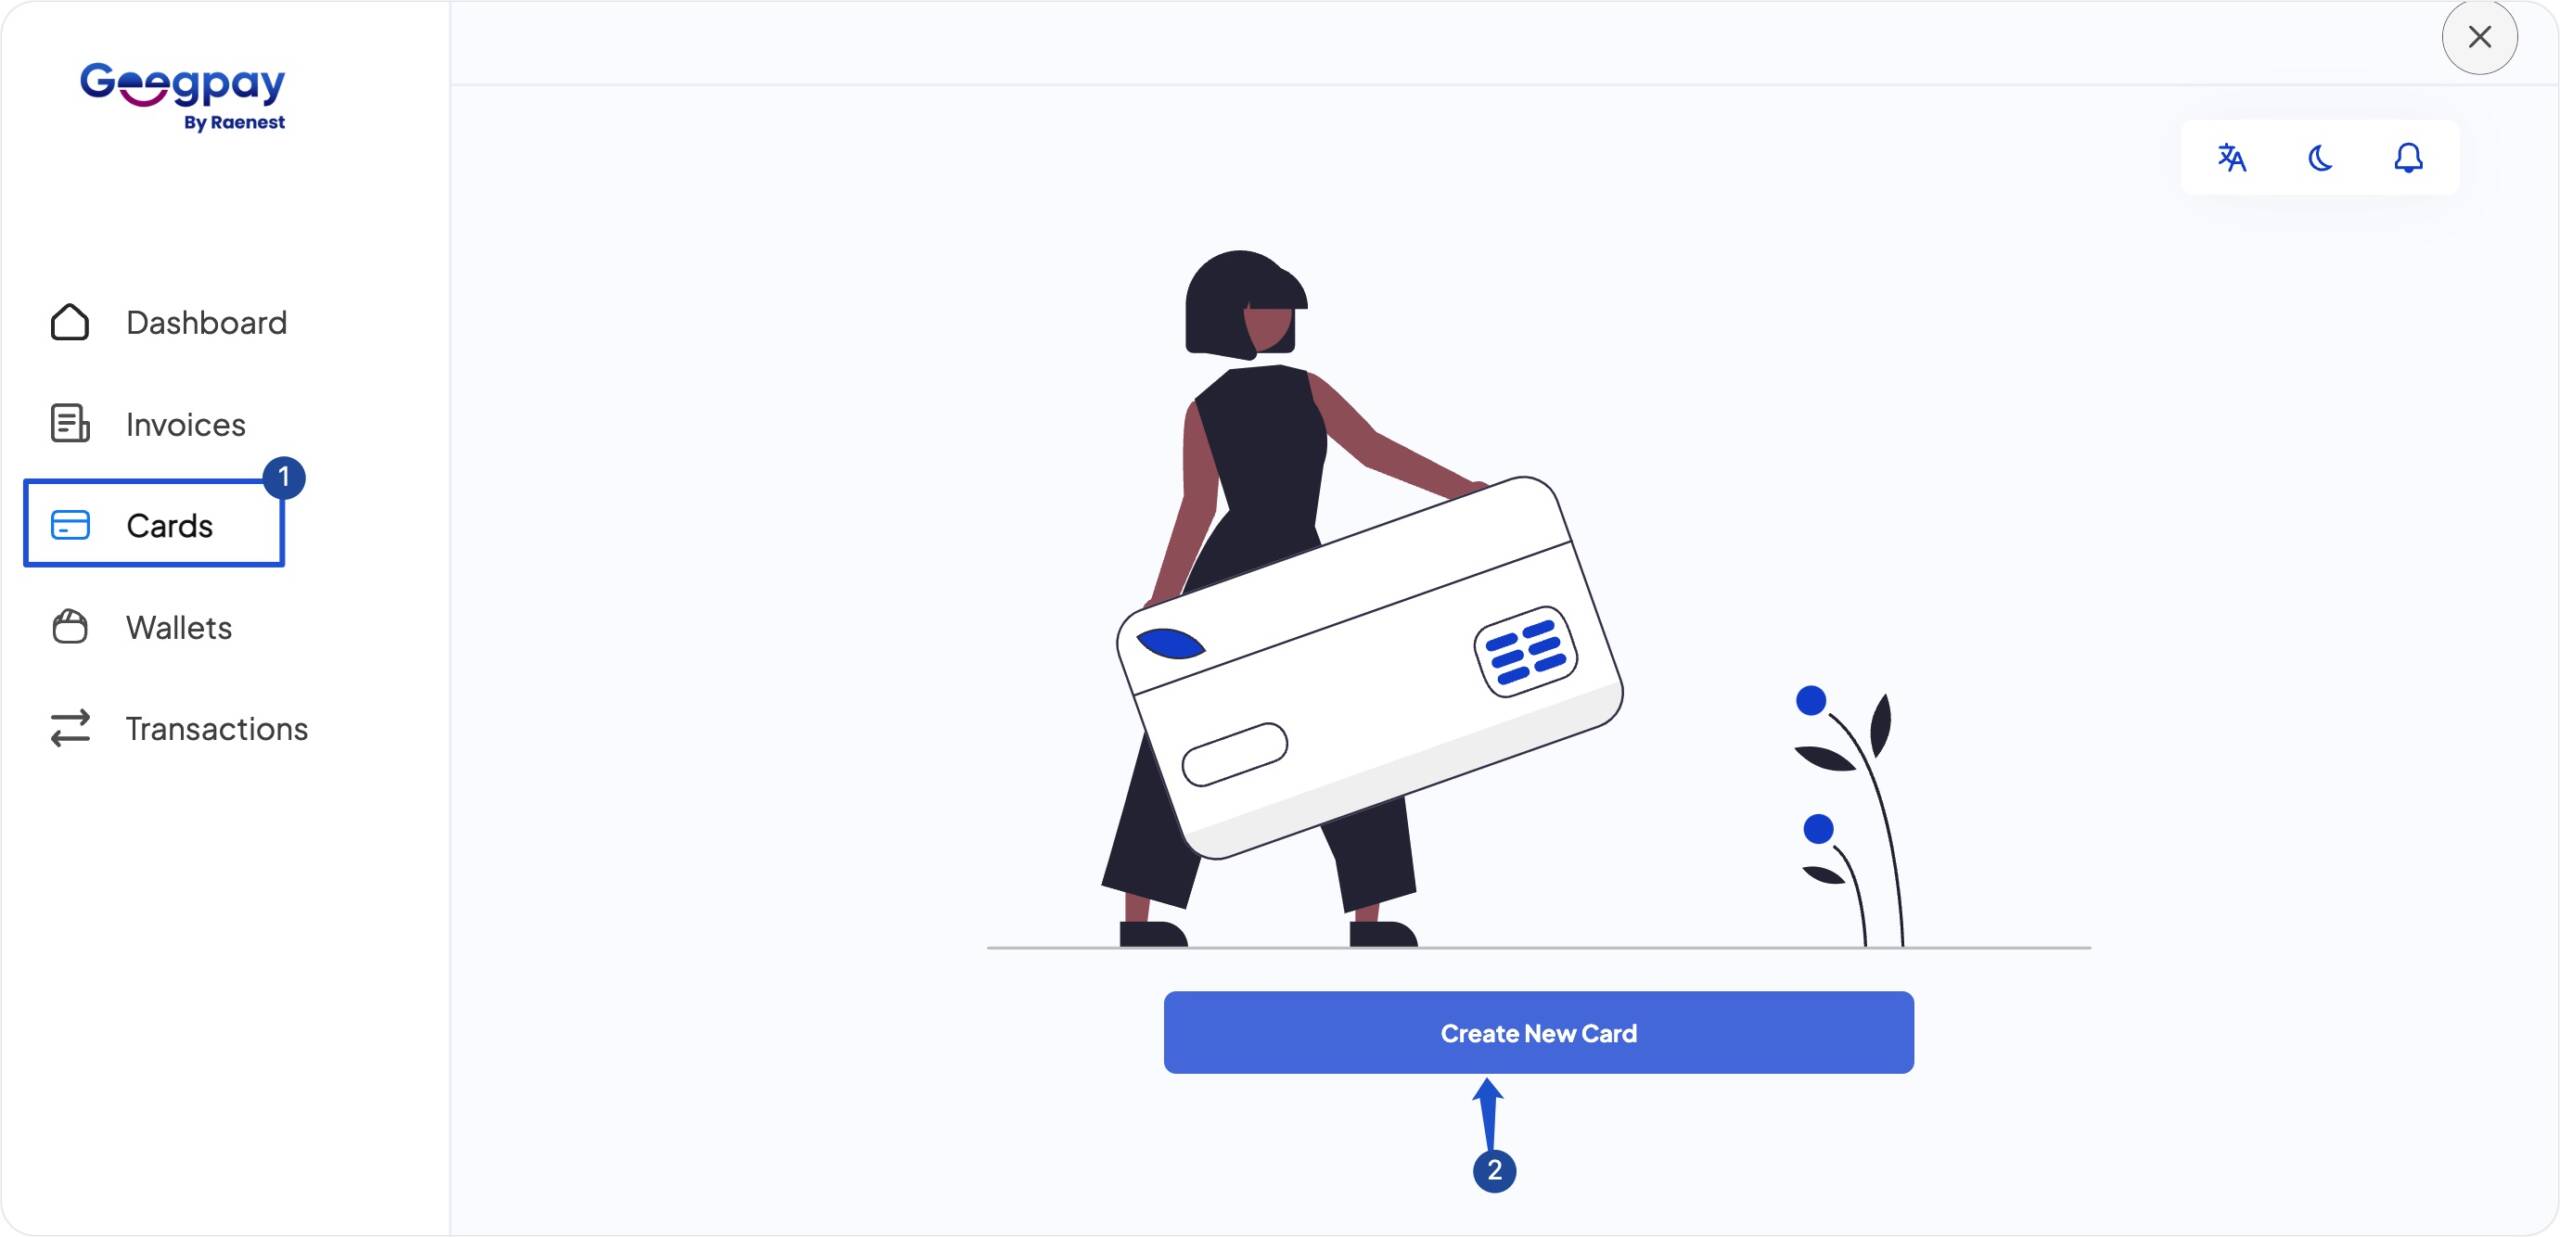
Creating a Virtual Dollar Card
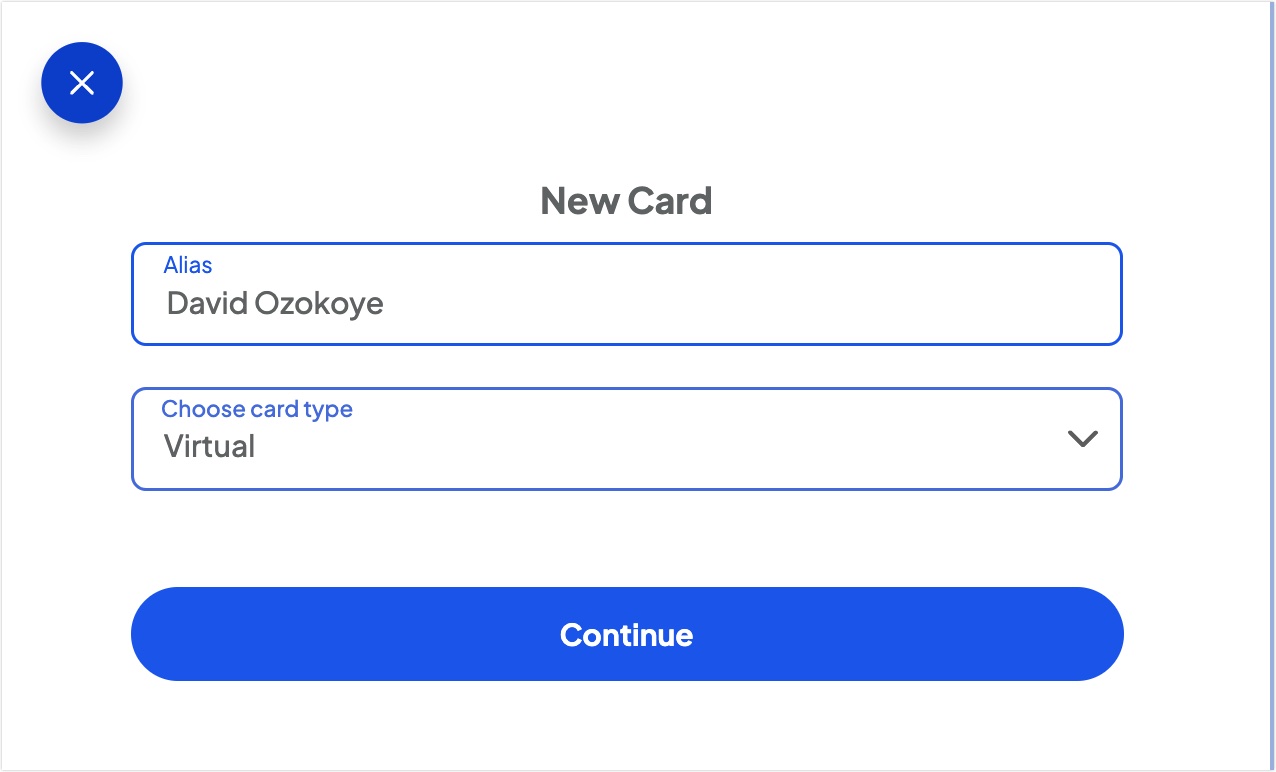
With Geegpay, you can create a virtual dollar card to use for online purchases. To create a dollar card, click on the Cards sidebar menu and select Create New Card.
Next, enter an Alias to easily identify your card, and then Choose the card type you’d like to create. Click Continue to proceed.
Next, choose the amount you’d like to fund your card with. Choose the wallet to debit and click Submit.
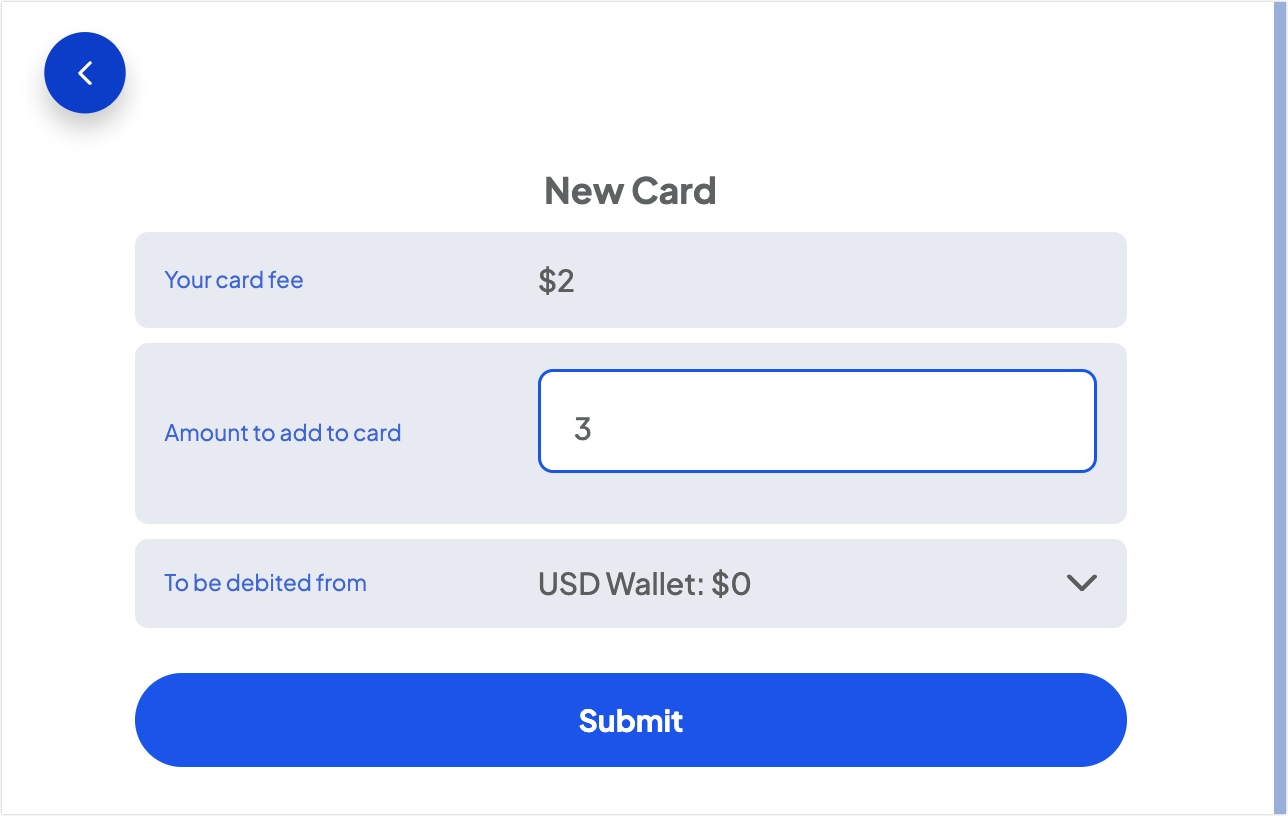
Your card should be created once the process completes. You can use this card to make payments online.
Conclusion
Opening a virtual foreign bank account is the easiest means to receive payments from foreign clients. You’ll get to exchange your USD at the black market rate.
In this guide, we’ve shown you how to create and verify an account with Geegpay. We also showed you how to request USD, GBP, and EUR accounts on your Geegpay wallet.
Geegpay is one of many platforms offering users virtual bank accounts. To discover other alternatives, please check our article on the best virtual USD bank account providers.
Last Updated on February 20, 2023


